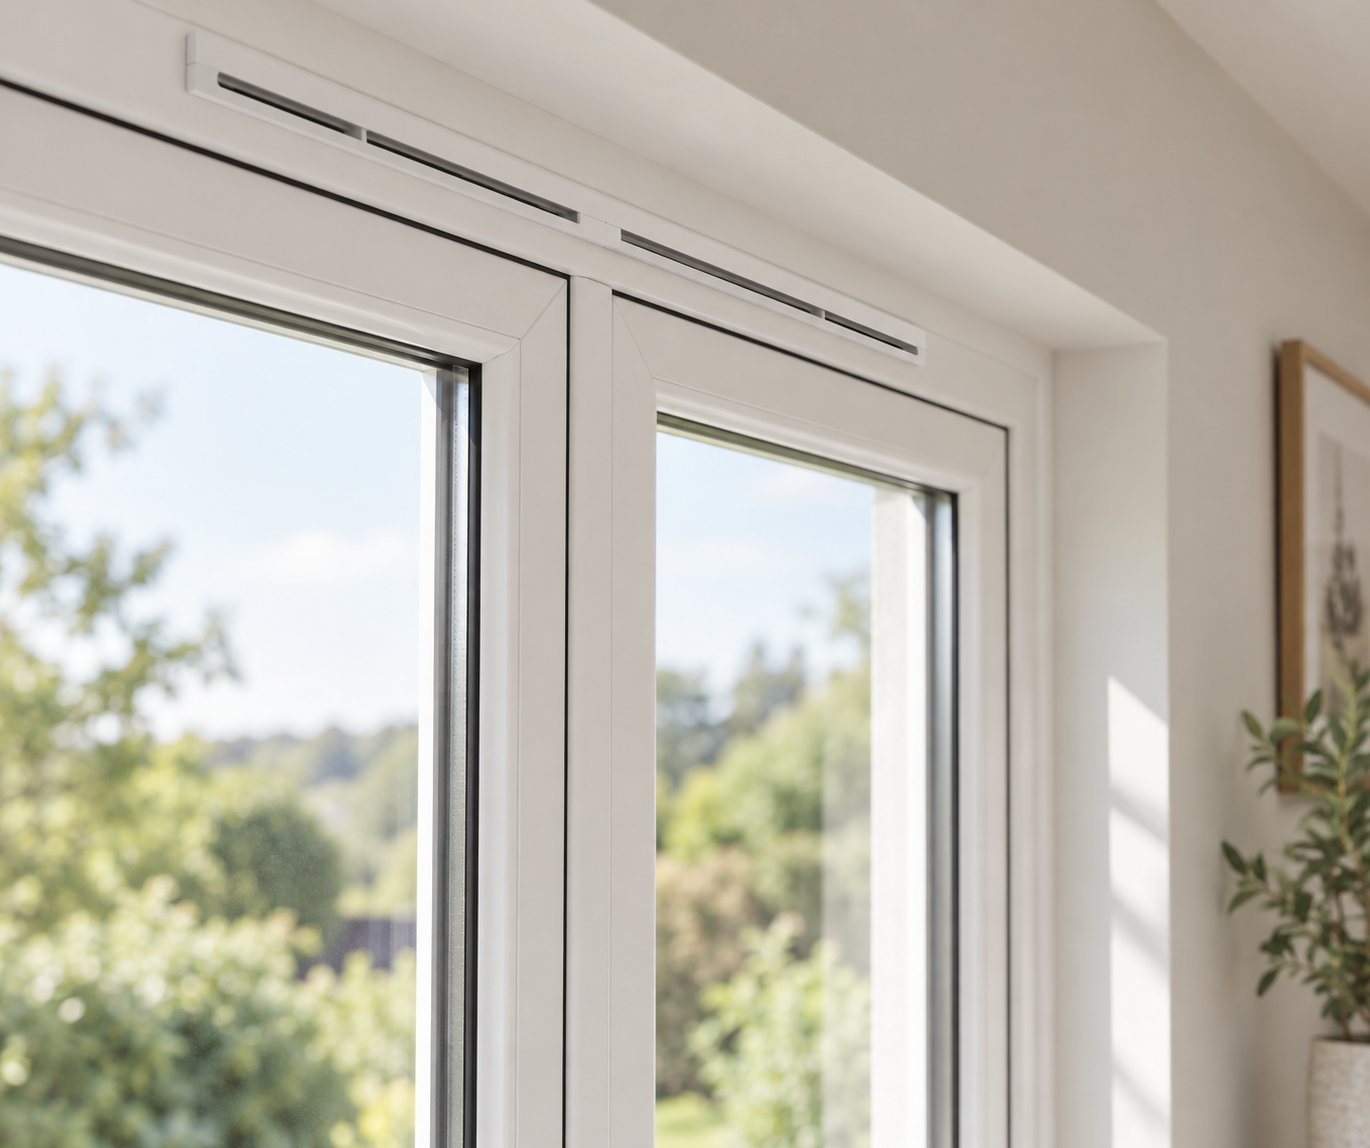
Picture a freshly installed set of flush casement windows with clean, modern sightlines — then imagine a chunky plastic canopy perched across the top of the frame, breaking the entire aesthetic. That frustration is exactly what drives homeowners and trade professionals toward slimline trickle vents. These low-profile ventilators deliver the continuous background airflow your sealed home demands, without the visual bulk that standard trickle vents impose on an otherwise sleek window design.
A slimline trickle vent is a narrow, discreet background ventilator featuring a reduced-height canopy and slot assembly mounted into or onto the head of a window frame. It provides controlled, passive airflow to indoor spaces without requiring the window to be opened, while maintaining a significantly lower visual profile than standard trickle vent models.
So, what is a trickle vent in the first place? At its simplest, a trickle vent is a small, adjustable opening built into a window frame — typically near the top — that allows a gentle, continuous stream of fresh air into a room while the window stays closed and locked. The "slimline" designation refers specifically to models engineered with a narrower, shallower canopy and a more compact slot assembly. You'll notice these vents sit much closer to the frame surface, often roughly half the canopy height of a conventional unit.
Within the broader trickle vent market, slimline variants occupy a specific niche. They are purpose-built for projects where aesthetics carry as much weight as ventilation performance — flush casement windows, heritage-style frames, contemporary aluminium systems, and any installation where a bulky vent body would clash with the design intent. The internal and external canopy components are both scaled down, yet they still fulfil the same core function: letting your home breathe passively, driven by natural pressure differences between indoors and outdoors, with no fan or power source required.
Today's homes are built tight. Advanced weathersealing, double and triple glazing, and insulated frames are brilliant for energy efficiency — but they also create an unintended side effect. When you seal a dwelling against drafts, you simultaneously trap moisture from cooking, showering, breathing, and drying laundry. That trapped moisture has nowhere to go, and the consequences are predictable: condensation streaming down cold glass surfaces, damp patches creeping across walls, and mould colonies thriving in corners.
As Breffni Insulation highlights, modern airtight homes require designed ventilation systems to control moisture and maintain fresh air, because the natural draughts older houses relied upon simply no longer exist. The purpose of trickle vents is to restore that missing background airflow in a controlled, secure way. Unlike cracking a window open — which invites noise, rain, security risks, and heat loss — window trickle vents and trickle air vents for windows let fresh air filter in quietly and continuously, even while you sleep or leave the house unattended.
This matters especially for ground-floor dwellings where leaving windows ajar raises obvious security concerns, and for roadside properties where traffic noise would pour in through an open sash. Slimline trickle vents solve all of these issues at once: they ventilate without compromising security, insulation, or the clean visual lines you paid for when you chose your windows. The real question, though, is how much you give up — or gain — by choosing a slimline profile over a standard one.
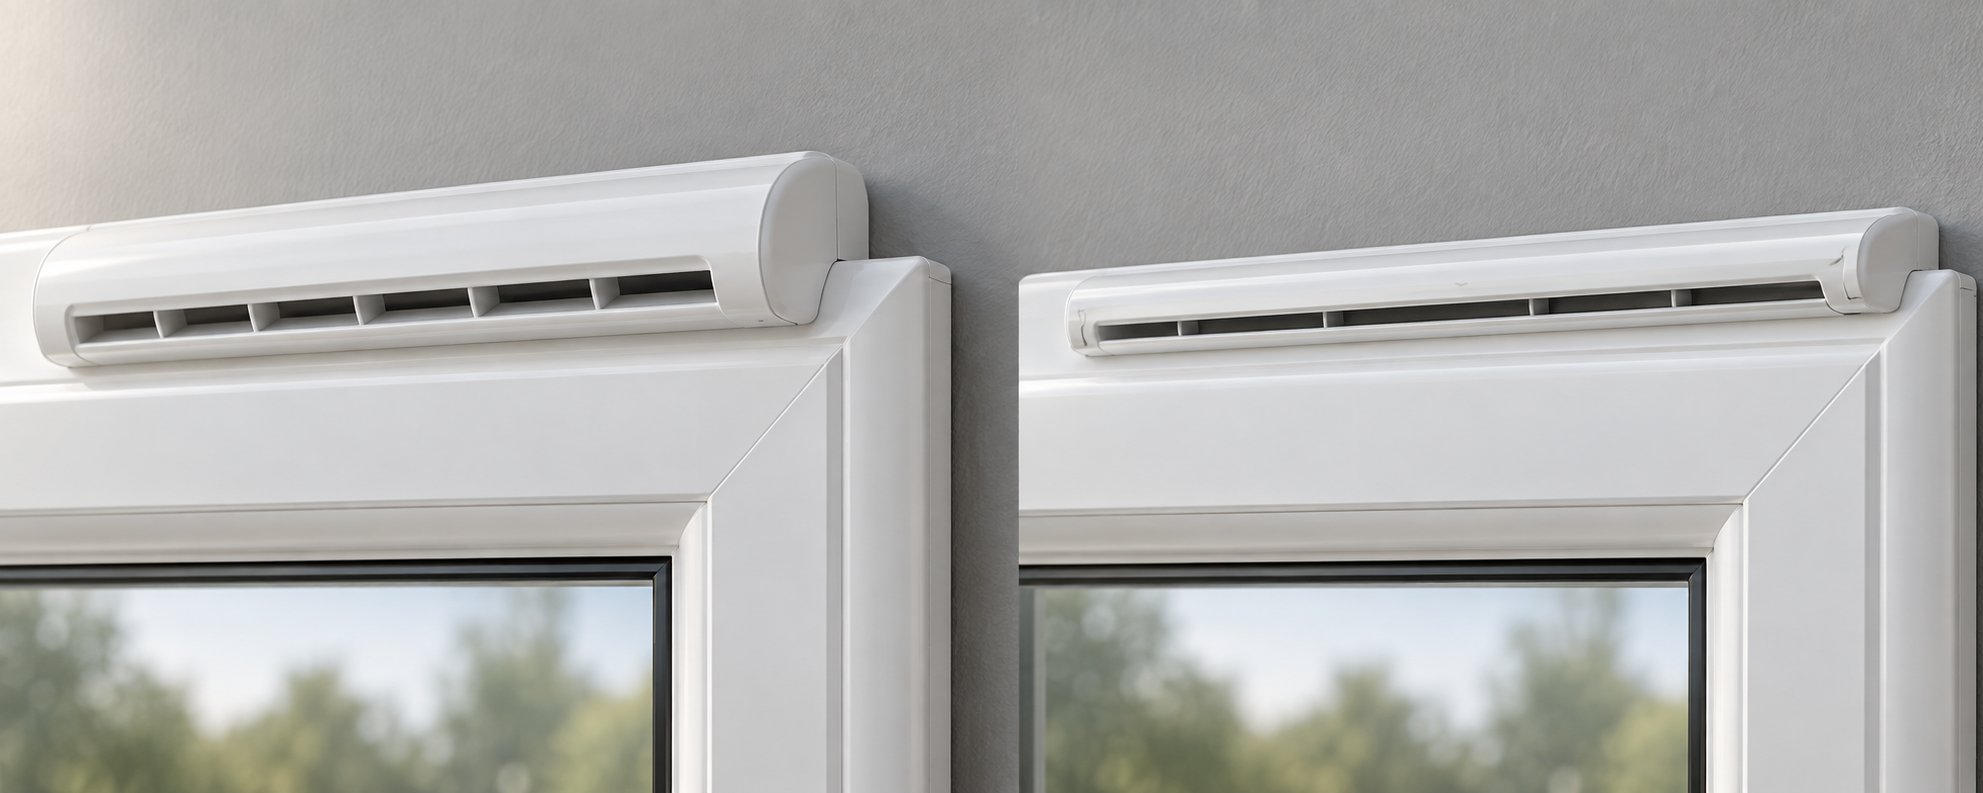
Choosing between types of trickle vents usually comes down to one tension: how much airflow can you get without ruining the look of your window? A standard-profile window trickle vent has been the industry workhorse for decades, but its canopy height and depth can dominate a frame's sightline — especially on narrow contemporary profiles. Slimline models were designed to challenge that compromise head-on. The comparison below lays out exactly where the two categories differ and where each one earns its place.
When you place a standard vent next to a slimline alternative, the difference is immediately visible. Standard canopies tend to project noticeably from the frame head, creating a ledge that catches the eye — and collects dust. Slimline canopies, by contrast, sit much closer to the frame surface, often at roughly half the canopy height of their full-size counterparts. That reduced profile is the entire point: it preserves the clean lines of flush fit trickle vents, heritage casements, and slim aluminium systems where visual discretion is a priority.
| Attribute | Standard Trickle Vent | Slimline Trickle Vent |
|---|---|---|
| Typical Canopy Height | Taller profile; often 16-20 mm or more above the frame line | Roughly half the canopy height of a standard vent; sits closer to the frame surface |
| Typical Canopy Depth | Deeper projection from the frame face | Shallower, low-profile projection designed to blend with the frame |
| Visual Impact on the Frame | Noticeable, especially on narrow or contemporary profiles | Minimal; designed to maintain clean sightlines on flush and heritage-style windows |
| Range of Available EA Ratings | Wide range, commonly from 2,500 mm² up to 5,000 mm²+ per unit | Typically lower per-unit EA; often in the 2,000 - 4,000 mm² range per unit |
| Common Frame Material Compatibility | uPVC, aluminium, timber — extensive model availability | uPVC, aluminium, timber — growing range, though fewer models than standard |
| Mounting Style | Surface mounted trickle vents or through-frame clip-fit | Typically clip-fit or concealed trickle vents integrated into the frame head |
You'll notice that trickle vent sizes across both categories share similar overall lengths — the key dimensional differences lie in the canopy's height and depth rather than its width. That distinction is what allows slimline units to deliver ventilation through the same frame slot while presenting a fraction of the visual footprint. For projects where the window design itself is a feature — think contemporary flush casements or slender aluminium frames — that reduced bulk makes a genuine aesthetic difference.
Surface mounted trickle vents in the standard category tend to project further from the frame, which is perfectly acceptable on traditional profiles with wider head rails. Concealed trickle vents, on the other hand, tuck the canopy assembly into or very close to the frame profile, and this is the territory where slimline designs truly excel. Their low-profile geometry allows them to integrate almost invisibly, particularly on frames where even a few extra millimetres of projection would disrupt the design language.
Here is the honest part of the conversation. Shrinking the canopy and slot dimensions means less physical space for air to pass through. A slimline vent's reduced cross-section typically translates to a lower Equivalent Area (EA) per unit compared to a full-size model. Research published in Sustainability confirms this principle directly — vents with a larger cross-sectional area deliver higher airflow at the same pressure difference, simply because there is less resistance in the air path. The implication for your project is straightforward: a single slimline unit may not provide enough EA to satisfy the ventilation requirements for a larger room, whereas a single standard vent might.
That does not make slimline vents the wrong choice — it makes them the right choice in different scenarios. You may need two slimline units per window, or one unit on each of two windows, to reach the same total EA that a single standard vent achieves alone. The trade-off is more units for less visual impact.
Slimline trickle vents are ideal when:
Standard vents may be more practical when:
The key takeaway? Slimline does not mean less effective — it means differently distributed. Knowing your room's EA requirement before you choose a vent profile is the single most important step in making the right call. And that EA figure, along with the building regulations behind it, deserves a much closer look.
Understanding the dimensions and trade-offs is one thing — but how does a trickle vent actually move air through your wall without a fan, a motor, or any electricity at all? The answer lies in basic physics and a surprisingly simple two-part assembly that handles everything passively.
Slimline trickle vents rely on natural pressure differences between the indoor and outdoor environment. When the air pressure outside your home differs from the pressure inside — driven by wind, temperature variation, or the stack effect in multi-storey buildings — air is pushed through the narrow vent slot from the higher-pressure side to the lower-pressure side. No power source is involved. Controlled chamber testing by Palcikovskis et al. measured this relationship directly, confirming that airflow through trickle vents increases proportionally with the pressure differential between indoor and outdoor environments. In practical terms, you get a gentle, continuous trickle of fresh air entering your room — enough to dilute moisture and stale air, but far too subtle to feel like a draft.
Every slimline trickle vent consists of two distinct components working together. Retailer product listings — such as those on HandleStore — frequently separate these parts, and for good reason: each serves a unique purpose. Here is what each component does:
Between these two canopies sits the ventilation slot itself — a narrow channel routed or moulded through the frame head. Air enters via the external canopy, passes through this channel, and exits through the internal canopy into your living space. The entire journey happens without any moving mechanical parts beyond the occupant-controlled slider.
If you have ever wondered how to open trickle vents, the process is refreshingly straightforward. Most slimline models use a small sliding tab integrated into the internal canopy. Push or slide the tab to one side to uncover the ventilation slot — that is the open position. Slide it back across to cover the slot, and you have restricted the airflow.
Some designs use a hinged flap instead of a slider. You simply press the flap upward to open it and push it back down to close. Either way, the mechanism requires no tools, no force, and takes about one second.
Here is the important part, though: knowing how to close trickle vents does not mean you should keep them shut. Building ventilation guidance consistently recommends leaving vents at least partially open to maintain background air exchange. Fully closing your trickle vent eliminates the passive airflow your sealed home relies on, and the consequences tend to show up quickly — moisture builds on cold glass surfaces, humidity climbs, and condensation risk spikes. In bedrooms and kitchens, where moisture generation is highest, a permanently closed vent is practically an invitation for mould.
A practical approach? Keep your vents open as the default. On days with extreme wind or driving rain, you can temporarily close them or reduce the opening to a narrow gap. Once conditions ease, slide them open again. Think of the trickle vent as your home's background breathing — it works best when it never fully stops.
With the mechanics clear, the next logical question becomes: how much airflow does your room actually need, and how do you know whether a slimline vent delivers enough? That answer lives in a number called Equivalent Area — and in the building regulations that define it.

Every slimline trickle vent on the market carries a number — something like 2500EA, 4000EA, or 5000EA — printed or stamped right on its internal canopy. That number is not a model code or an arbitrary label. It is the single most important performance metric you need to understand before selecting any vent, and it connects directly to whether your installation will pass building control inspection or send you back to the drawing board.
Yet despite its importance, Equivalent Area remains one of the most poorly explained concepts in the window ventilation space. Homeowners encounter it on product listings without context, and even some trade professionals treat it as a box-ticking exercise rather than a genuine design consideration. Here is what it actually means — and why it determines everything about your vent selection.
Equivalent Area — abbreviated as EA and expressed in square millimetres (mm²) — measures how much air a trickle vent can deliver under standardised conditions. Think of it as a performance rating for airflow capacity. A vent rated at 4000EA allows the equivalent airflow of a 4,000 mm² open hole in the wall, even though the vent's actual physical slot may be shaped, baffled, or angled in ways that differ from a simple opening. The measurement accounts for the resistance created by the vent's internal geometry, canopy design, and any acoustic baffles, giving you a realistic picture of real-world airflow rather than just the raw slot dimensions.
Back in 2006, the UK fenestration industry shifted from measuring trickle vent performance in Free Area to Equivalent Area, as ERA's ventilation guidance explains. This was a significant change. Free Area simply measured the physical size of the opening, while EA provides a more accurate indication of how much air actually flows through the vent under pressure. Two vents with identical slot sizes can have very different EA ratings depending on their internal design — and EA is the figure that building regulations now recognise.
You will commonly encounter these EA tiers across product ranges from manufacturers including ERA, Titon, and others:
A higher EA number means greater airflow capacity per vent unit. Straightforward enough. The critical consideration for slimline trickle vents, however, is that their reduced slot dimensions and lower-profile canopies typically place them at the lower end of this range. A slimline model might offer 2,500 or 3,000 mm² EA per unit where a full-size equivalent delivers 4,000 or 5,000 mm². That is not a flaw — it is a direct consequence of the compact geometry that gives these vents their aesthetic advantage. It simply means you may need two or three slimline units to reach the same total EA that a single standard-height vent provides.
Always calculate your room's total required Equivalent Area before selecting a vent model. Choosing a slimline profile for its looks, only to discover it falls short of the EA threshold for your room, leads to costly revisits and potential compliance failures.
So — do windows have to have trickle vents, and are trickle vents required by law? The short answer is yes. Since the 2022 updates to Approved Document F of the UK Building Regulations, background ventilation is mandatory for virtually every new build, extension, and replacement window installation. Compliance is policed through competent person schemes such as FENSA, Certass, and LABC, and failure to meet the requirements can create serious problems when selling or certifying a property.
The specific EA thresholds your installation must hit depend on the dwelling type and the room in question. Based on the current Part F requirements referenced by both ERA and Window Ware's compliance guide, the minimum figures are:
| Room Type | Multi-Storey Dwelling | Single-Storey Dwelling (Bungalow/Flat) |
|---|---|---|
| Habitable rooms and kitchens | 8,000 mm² EQA minimum | 10,000 mm² EQA minimum |
| Bathrooms | 4,000 mm² EQA minimum | 4,000 mm² EQA minimum |
| WCs and utility rooms | No minimum stated, but ventilation still required | No minimum stated, but ventilation still required |
These figures are measured per room, not per window. The whole-house calculation method has been scrapped, meaning each individual space must independently meet its EA target. If your living room in a two-storey house requires 8,000 mm² EQA, you could achieve that with two 4000EA vents, or a combination such as one 5000EA vent plus one 3000EA unit. The maths is flexible — what matters is the total.
Can slimline trickle vents satisfy these thresholds? Absolutely — provided the total installed EA across all trickle vents in windows within that room meets or exceeds the regulation figure. Imagine a bedroom with two windows: fitting a slimline vent rated at 4000EA into each window head gives you a combined 8,000 mm² EQA, which clears the multi-storey habitable room requirement comfortably. In a bathroom, a single slimline unit rated at 4000EA handles compliance on its own.
Manufacturers like Titon have built comprehensive resources around helping specifiers navigate these figures. Titon trickle vents background ventilation guidance, for example, includes Part F airflow calculators and compliance documentation that walk you through the room-by-room process. Whether you use their tools or calculate manually, the principle remains the same: should windows have trickle vents? Without question. And should you verify the EA arithmetic before committing to a slimline profile? Every single time.
For replacement windows, the regulations add another layer. If the original windows already had trickle vents installed, the new installation must provide at least the same EA — never less. If the old windows had no vents at all, the replacement must now include them to bring the property up to current Part F standards. This applies regardless of whether you choose slimline or standard-profile units.
All of this regulatory detail boils down to a practical reality: EA ratings are not optional knowledge. They are the foundation of every compliant trickle vent installation, and understanding them turns the selection process from guesswork into a straightforward calculation. With the numbers clear, the next step is matching the right vent to your specific window system — frame material, colour, and acoustic needs included.
Knowing your EA target is essential — but it is only one piece of the puzzle. A vent with the perfect airflow rating is useless if it cannot physically fit your frame, clashes with your window colour, or lets road noise pour into a bedroom that faces a dual carriageway. The selection process works best when you treat it as a checklist of layered priorities, each one narrowing the field until the right product becomes obvious.
Here are the key decision factors, roughly in the order you should address them:
Work through that list from top to bottom, and you will avoid the most common buying mistakes — ordering a vent that looks right but will not clip into your frame, or one that fits perfectly but leaves the room non-compliant.
Your window frame material is the single most important filter when shopping for slimline trickle vents. A vent designed for a uPVC frame head will not seat properly in an aluminium profile, and a timber-specific model relies on screw fixings and sealing details that make no sense on plastic. Each material brings its own fitting method, dimensional tolerances, and aesthetic expectations.
uPVC frames are the most common starting point for UK homeowners. Slimline vents for uPVC typically use a clip-fit mounting system — the internal and external canopies snap onto the frame head over a routed ventilation slot, often without any visible screws. This creates the cleanest possible finish and makes the vent feel like an integrated part of the window rather than an add-on. Because uPVC profiles tend to offer generous head rail depth, most slimline models fit comfortably. Just be aware that some frames contain steel reinforcement within the chamber, which can affect where and how the ventilation slot is cut.
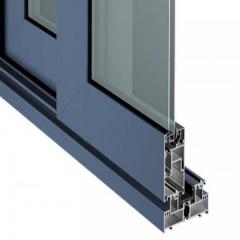
Aluminium trickle vents demand more care during selection. Industry specialists note that aluminium frames are costlier and trickier to work with — you need to drill and cut through the metal profile with precision, leaving little room for error. Trickle vents for aluminium windows are typically manufactured from matching anodised or powder-coated aluminium, so they blend visually with the frame's metallic finish rather than looking like a plastic afterthought. Frame profiles tend to be slimmer than uPVC equivalents, so always confirm the available installation depth before ordering. The payoff is worth it: a well-matched aluminium slimline vent on a contemporary aluminium window is virtually invisible.
Timber frames occupy a different space. Wooden window trickle vents suit heritage properties, listed buildings, and period homes where the frame itself is an architectural feature. The fitting method is straightforward — timber allows clean routing and accepts screw fixings easily — but the exposed cut edges must be sealed with primer or wood preservative to prevent moisture ingress and eventual rot. Some manufacturers offer timber-effect finishes that match common stain and paint tones, while others produce vents in raw aluminium or uPVC that can be painted on-site to coordinate with the frame.
Colour matching is a detail that sounds minor until you get it wrong. Browse product pages across retailers like HandleStore, ERA, and SD Hardware, and you will find slimline vents listed in white, brown, black, grey, and sometimes woodgrain or dual-colour finishes (different colours on the internal and external canopies). This is not cosmetic vanity — it is a standard industry consideration that reflects how noticeable a mismatched vent can be. A bright white canopy on a dark grey aluminium frame draws the eye to exactly the spot you are trying to make disappear. Before purchasing, confirm that the vent finish matches your frame material and colour on both the interior and exterior faces.
Imagine you have selected a beautifully discreet slimline vent, matched the colour to your frame, confirmed the EA rating, and installed it flawlessly — only to discover that every passing lorry now sounds like it is idling in your living room. Standard trickle vents, including slimline models, allow air through a relatively direct path. Sound waves follow that same path. In quiet suburban settings, the noise transfer is negligible. In noisier environments, it becomes a genuine problem.
This is where acoustic trickle vents earn their place. These specialised units incorporate internal baffles, sound-absorbing chambers, or labyrinth-style air paths that force incoming air through a series of turns and absorptive surfaces. Sound waves lose energy at each change of direction, while air continues flowing through with minimal resistance. The result is ventilation with significantly less noise intrusion.
According to Titon's acoustic testing data, the key performance metric to look for is the Dn,e,w rating — the weighted element-normalised level difference, expressed in decibels (dB). A higher Dn,e,w value means better sound insulation. Products achieving 50 dB or above are considered high-performance acoustic solutions, while models in the 40-50 dB range offer good noise reduction suitable for most urban environments. Standard non-acoustic vents typically sit considerably lower on this scale.
When should you specify an acoustic trickle vent? Consider it essential in any of these situations:
There is one honest trade-off to flag. Acoustic trickle vents for windows require additional internal baffle material and chamber volume to attenuate sound effectively. That extra hardware has to go somewhere — and it typically adds a few millimetres to the canopy's height or depth. A slimline acoustic model will still be more discreet than a full-size standard vent, but it may not be quite as slim as its non-acoustic counterpart. If both noise control and minimal visual impact rank highly on your priority list, check the manufacturer's dimensional data carefully and compare the acoustic variant's profile against the standard slimline in the same range.
Double glazing trickle vents — whether acoustic or not — should be viewed as one layer of your overall sound strategy. They work best when paired with well-sealed window units, appropriate glass specifications, and attention to other potential weak points in the building envelope. An acoustic vent cannot compensate for a poorly sealed frame or single-glazed panel elsewhere in the same opening.
With the right frame compatibility, colour match, and acoustic specification confirmed, the practical question shifts to getting the vent physically into the window — a step-by-step process that varies meaningfully depending on your frame material and the tools at hand.

Selecting the perfect vent means nothing if it ends up crooked in the frame, leaking rainwater through a badly cut slot, or rattling every time the wind picks up. The installation itself is where planning meets reality — and where most homeowners and even some tradespeople feel least confident. The good news? Fitting trickle vents follows a logical, repeatable sequence regardless of frame material. The tools and techniques vary slightly between uPVC, aluminium, and timber, but the core workflow stays consistent.
Before picking up any power tool, gather your materials and equipment. As Home Secure Shop's installation guide recommends, you will need: the trickle vent kit (internal canopy, external canopy, and any supplied fixings), a measuring tape, pencil or marker, drill with appropriate bits, a router or jigsaw depending on your frame material, sandpaper or a deburring tool, weatherproof silicone sealant, and — critically — safety glasses and protective gloves. Eye protection is non-negotiable when cutting into any frame material, as plastic shavings, metal filings, and timber chips travel fast and unpredictably.
Here is the general step-by-step process for how to install trickle vents in windows, applicable across all frame types:
That sequence covers the universal workflow. The real nuances emerge when you consider the specific frame material you are working with, because each one presents its own challenges and techniques for how to fit trickle vents properly.
Fitting a trickle vent in uPVC windows is the most common installation scenario in the UK, and fortunately, it is also one of the most forgiving. uPVC is relatively soft, easy to cut, and tolerant of minor imperfections that would cause problems in harder materials.
Start by marking the centre line of the frame head. Measure the total width of the frame rail, divide by two, and draw a vertical centreline. Then position the vent template — or measure the slot dimensions from the vent's instructions — and mark the slot outline symmetrically around that centreline.
For cutting the slot, you have two practical options. The cleaner method uses a router fitted with a straight-cutting bit, guided along the marked line. This produces a neat, uniform slot with minimal cleanup required. If you do not have a router, the alternative is a drill-and-jigsaw method: drill a series of closely spaced holes along the marked slot line using an appropriately sized bit, then connect them with a jigsaw fitted with a fine-toothed blade. The jigsaw approach takes more care to keep straight, so clamp a straight edge to the frame as a cutting guide wherever possible.
One important consideration before cutting: check for steel reinforcement inside the uPVC chamber. Many uPVC profiles contain galvanised steel inserts for structural rigidity, and hitting one unexpectedly with a router or jigsaw will damage both the tool and the frame. Tap the frame head firmly — a hollow, plastic sound suggests no reinforcement in that area, while a solid, metallic ring indicates steel beneath. If reinforcement is present, you may need to adjust the slot position or consult the frame manufacturer for guidance.
After cutting, deburr the slot edges with fine sandpaper or a plastic deburring tool. Then click the internal canopy into position from inside the room. Many slimline vent models designed for uPVC use a clip-fit system — the canopy has integral tabs that snap over the slot edge without any screws. This gives a cleaner finish and speeds up the installation considerably. The external canopy clips on from outside following the same principle. Some kits include snap-on end caps that conceal the canopy ends for a neater appearance, so check your kit contents before assuming you are finished.
Aluminium frames look spectacular with slimline vents installed, but the installation process requires noticeably more care than uPVC. The material is harder, less forgiving of mistakes, and — crucially — many aluminium window profiles incorporate a thermal break: an insulating strip sandwiched between the inner and outer sections of the frame. Cutting through or damaging this thermal break compromises the frame's insulating performance and may void the window manufacturer's warranty.
Use HSS (high-speed steel) or cobalt drill bits specifically rated for aluminium. Standard wood or masonry bits will wander, overheat, or leave ragged edges. Cut slowly, apply steady pressure, and use cutting lubricant to reduce friction and heat buildup. If routing a slot, a carbide-tipped straight bit with a slow feed rate produces the cleanest results. Colin's Sash Windows notes that aluminium frames are often described as "too slim" for trickle vents, but that is typically a design-choice limitation rather than a genuine feasibility barrier — slimline models requiring as little as 18 mm of frame height can often fit where older, bulkier vents never could.
Once the slot is cut, deburr all metal edges thoroughly. Aluminium swarf is sharp and can interfere with the canopy seating. Fit the internal and external canopies according to the manufacturer's fixing method — some aluminium-specific vents use screw fixings rather than clip-fit, as the harder material provides a more secure anchor point for threaded fasteners.
Timber frames offer a different experience entirely. Wood is the easiest frame material to route cleanly, and a standard router with a straight bit will produce a perfect slot with minimal effort. The cutting itself is straightforward — but what happens after cutting matters just as much.
Every exposed cut edge on a timber frame is a potential entry point for moisture. Left unsealed, the fresh-cut wood absorbs rainwater, swells, and eventually rots — undermining both the frame's structural integrity and the vent's weatherproofing. Seal all cut surfaces immediately with wood primer, preservative, or a suitable end-grain sealer before fitting the canopy components. This step takes only a few minutes but adds years to the life of the installation.
Timber vent canopies are typically secured with small screws rather than clip-fit tabs, since wood provides excellent screw-holding capacity. Pre-drill pilot holes to avoid splitting, particularly in hardwood frames or narrow sections close to the frame edge. Once both canopies are fixed and the sealant has cured, test the vent operation and confirm that the external canopy sits tight against the frame with no gaps that could admit water.
Regardless of frame material, always follow the manufacturer's installation instructions for your specific vent model. Generic steps provide a solid foundation, but dimensions, fixing methods, and sealing requirements vary between products.
Installing trickle vents in new windows during manufacturing is always simpler than adding them later. But what if your windows are already in place, sealed up tight, and showing every symptom of inadequate ventilation? Retrofitting slimline vents to existing frames is not only possible — it is one of the most common reasons people seek out these low-profile models in the first place.
Your windows were installed without a single trickle vent. Maybe they went in before the 2022 Building Regulations update made background ventilation mandatory. Maybe the previous homeowner opted out, or the original installer never raised the subject. Whatever the reason, you are now living with sealed units, rising humidity, and condensation patterns that tell you something needs to change — but ripping out perfectly good windows feels like an expensive overreaction.
This is exactly where retrofit trickle vents earn their keep. And among the available retrofit options, slimline models hold a distinct advantage: their low-profile canopies minimise the visual disruption to windows that were never designed to carry a vent in the first place. A bulky standard-height canopy bolted across the head of an existing frame looks like an obvious afterthought. A slimline alternative sits close enough to the frame surface to blend in, preserving the original window's clean lines as much as physically possible.
Can you install trickle vents into existing windows? In nearly all cases, yes. Colin's Sash Windows confirms from hands-on installation experience that almost every window can accommodate background ventilation if the correct approach is used — the real question is not whether it is possible, but which retrofit method suits the specific window in front of you.
Not every homeowner wakes up thinking about trickle vents on windows. Retrofit typically gets triggered by a specific event or problem that forces the ventilation question to the surface. Here are the most common scenarios:
In each of these situations, the appeal of a slimline approach is the same: you can add trickle vents to windows that were built without them while keeping the visual change as subtle as possible. The window still looks like your window — just one that breathes now.
The enthusiasm for retrofitting should always be tempered by a practical site assessment. Not every frame accepts a routed ventilation slot without complications, and choosing the wrong method for the wrong frame creates problems far worse than condensation.
Frame depth and material thickness are the first things to verify. Slimline frame-fitted vents can require as little as 18 mm of frame head height, which makes them viable in many profiles that would reject a full-size vent. However, the frame chamber behind that head rail must also be deep enough to allow the ventilation slot to pass through cleanly. If the profile is too shallow — common in some older aluminium systems — you may not have enough material to route without breaching the outer skin of the frame.
Reinforcing steel in uPVC frames deserves special attention. Many uPVC profiles contain galvanised steel inserts within the chamber to provide structural rigidity. If your planned slot position coincides with that reinforcement, cutting through it weakens the frame and risks long-term bowing or security issues. Always probe or tap the frame head before committing to a cut position. A hollow, plastic sound typically indicates a clear chamber, while a solid metallic ring warns you that steel lies beneath. In some cases, the slot position can simply be shifted to avoid the reinforcement. In others, you may need a different approach entirely.
When frame modification is not feasible, two credible alternatives exist. Glazed-in trickle vents bypass the frame altogether — the sealed glass unit is replaced with a slightly shorter IGU (typically around 45 mm shorter), and the vent assembly is clipped into the freed space at the top of the glazed area. This method keeps the frame completely untouched, making it ideal for heritage properties, conservation areas, and any situation where cutting the frame is either impractical or prohibited. The trade-off is higher cost, since a bespoke sealed unit must be manufactured. Through-wall ventilation solutions offer another path — a core-drilled vent through the wall adjacent to the window provides background airflow without modifying the window at all. This suits situations where both the frame and the glazing must remain undisturbed.
Sash windows are a common retrofit candidate that often gets overlooked. Both traditional box sash and modern spring-balance sash frames can accept trickle vents, though the fitting location may differ. On a box sash, the vent is typically routed into the top rail of the upper sash or into the head of the outer frame. On tilt-and-turn or top-hung sashes, the vent sits in the frame head just as it would on a casement. Glazed-in vents are frequently preferred for timber sash windows where aesthetics matter, since routing into a visible timber rail can disrupt the period character of the window.
Door frames round out the retrofit picture. French doors, patio doors, and composite entrance doors all benefit from background ventilation — especially in kitchens or utility rooms where the door may be the only viable location for a vent. Slimline models work particularly well on door frames because the reduced canopy height avoids interfering with door operation or weatherseal compression at the head.
Whatever the window type, the golden rule remains the same: assess first, cut second. A five-minute inspection of frame depth, reinforcement, and material condition prevents expensive mistakes and ensures the retrofit delivers lasting performance rather than short-lived regret. For complex or unfamiliar frame systems, an experienced installer's assessment is a small investment that pays for itself many times over.
Getting a vent into an existing frame is only half the story, of course. The real payoff comes in the weeks and months after installation — when condensation patterns change, air quality improves, and the window you thought was perfectly sealed finally starts working the way a modern home demands.

Those first few mornings after installation tend to tell the story. You walk into the bedroom, glance at the glass, and notice something different — the rivers of condensation that used to stream down the pane have thinned to a light mist, or disappeared entirely. The air in the room feels subtly fresher, less stuffy, without any obvious draft or chill. Nothing dramatic happened overnight. Your slimline trickle vents simply started doing what passive ventilation is designed to do: quietly exchanging stale, moisture-laden indoor air with drier air from outside, around the clock, with no input from you whatsoever.
But do trickle vents actually deliver on the promises? And once they are in place, what — if anything — do you need to do to keep them performing? Both questions deserve honest, practical answers rather than marketing claims.
Condensation on windows is not a mystery — it is basic physics. Warm indoor air holds more moisture than cold air. When that warm, humid air contacts a cold surface like a window pane, it cools rapidly and releases its moisture as water droplets. The result: streams of water on the glass, pooling on the sill, and eventually feeding mould growth in the window reveals and surrounding walls.
So, do trickle vents stop condensation? They attack the problem at its source — relative humidity. By maintaining a continuous trickle of drier outdoor air into the room, the vents dilute the concentration of moisture in your indoor environment. Lower indoor humidity means the air reaching your cold window surface carries less water vapour, and there is less moisture available to condense. As Timber Windows explains, trickle vents work to cycle the air in your home, remove the stale air, and help fight condensation, damp, and mould — particularly during winter when homeowners are understandably reluctant to crack windows open.
Do window trickle vents work in every situation? Here is where honesty matters. Background ventilation through slimline trickle vents is highly effective at reducing condensation in typical residential scenarios — a bedroom occupied by one or two people, a living room with normal heating, a bathroom that gets used for daily showers. In these environments, the continuous air exchange provided by correctly sized and positioned vents makes a measurable difference to surface moisture levels.
However, trickle vents alone may not eliminate condensation entirely in more extreme conditions. Consider a small, poorly heated bedroom shared by multiple occupants, where body moisture and breathing generate significant humidity overnight. Or a kitchen during prolonged cooking sessions without an extractor fan running. In these high-moisture-generation scenarios, the modest airflow through a trickle vent — even a generously rated one — cannot remove moisture as fast as it is being produced. The trickle vents condensation risk in UK residential properties drops significantly when vents are installed, but they perform best as one component within a whole-dwelling ventilation strategy that also includes extract fans in wet rooms, adequate heating to keep surface temperatures above dew point, and sensible moisture management habits like using pan lids, running extractors during showers, and avoiding drying laundry on radiators in closed rooms.
Think of your slimline vents as the baseline layer of defence. They handle the slow, steady moisture load that accumulates throughout the day — the background humidity from breathing, from damp coats hanging in the hallway, from the kettle boiling. For sharp spikes in moisture, you need active extraction. Together, the two systems keep your indoor humidity within the range where condensation simply cannot form on properly warmed glass.
Beyond condensation, there is a broader benefit that is easy to overlook: indoor air quality. Sealed homes trap more than just moisture. Volatile organic compounds from paint, furniture, and cleaning products accumulate in still air. Carbon dioxide levels climb in occupied rooms without ventilation, contributing to that heavy, stale feeling you notice when entering a closed bedroom in the morning. Slimline trickle vents address this by maintaining a constant exchange of indoor and outdoor air — not dramatically, but persistently. The result is fresher-feeling rooms, reduced stuffiness, and a healthier breathing environment, especially in homes where windows rarely get opened due to security, noise, or weather concerns.
Here is one of the most practical advantages of slimline trickle vents over more complex ventilation systems: they have no motors, no filters to replace, and no moving parts beyond a simple slider or flap. Maintenance is minimal — but "minimal" does not mean "none." A neglected vent gradually loses its effectiveness as dust, debris, and insects accumulate in the canopy and slot, restricting the airflow that the entire system depends on.
A few minutes of attention each season keeps everything running smoothly. Here is a straightforward seasonal maintenance checklist:
What if a component gets damaged? A cracked external canopy from an impact, a broken slider tab, or a discoloured internal cover that has yellowed with age — these are not reasons to replace the entire vent assembly. Replacement trickle vents and individual canopy covers are widely available from hardware suppliers and online retailers. The key is identifying the correct replacement size and type. Measure the overall length of your existing vent, note the canopy height and depth, and check the EA rating printed on the old unit. Armed with those three details, you can source a matching component without guesswork. Many manufacturers use standardised slot dimensions across their ranges, so a replacement canopy from the same brand will typically clip straight onto the existing frame slot without modification.
If you cannot identify the original manufacturer, a universal-fit replacement canopy designed for the same frame material — uPVC, aluminium, or timber — will usually work, provided the slot length and width match. When in doubt, take the old canopy to a local hardware specialist or photograph it alongside a ruler and share the measurements with the supplier before ordering.
The underlying principle is simple: do trickle vents work over the long term? They do — as long as you let them. An open, clean vent performs exactly as it did on day one. A clogged or permanently closed one delivers nothing. A couple of minutes per season is all it takes to keep the airflow steady, the humidity controlled, and the condensation at bay.
With performance and upkeep covered, the final piece of the puzzle is making sure you choose the right vent for your specific project — pulling together everything from EA calculations and frame compatibility to colour matching and supplier selection into one clear, actionable buying decision.
You have the knowledge — EA ratings, frame compatibility, acoustic considerations, retrofit feasibility, and maintenance expectations. The challenge now is compressing all of that into a single, clear purchasing decision that gets it right the first time. Rather than revisiting every detail, here is the streamlined checklist that pulls together everything covered above into a practical sequence you can follow from your desk to your doorstep.
Work through those five steps in order, and you eliminate the most common purchasing errors before they happen.
Different window system manufacturers sometimes recommend — or even require — specific vent models designed for their profiles. A vent engineered for a particular frame system sits flush, seals correctly, and preserves any warranty the window manufacturer provides. Fitting a generic vent into a proprietary profile can result in poor canopy seating, compromised weatherproofing, and potential warranty disputes.
This is especially relevant for integrated window systems. A velfac trickle vent, for instance, comes pre-matched to Velfac's composite frame geometry, ensuring seamless integration that a third-party vent may struggle to replicate. The same principle applies across other system-specific ranges — always check whether your window manufacturer specifies a preferred or required ventilation product before sourcing independently.
With hundreds of products on the market, narrowing the field to credible options saves hours of comparison shopping. Here are several top window trickle vent options UK buyers should evaluate, each offering a genuine combination of slim profile, proven performance, and reliable availability:
Each of these options addresses different priorities — quiet performance, technical depth, responsive airflow, or retail accessibility. The right choice depends on which factors rank highest for your specific project. Cross-reference your checklist results against each product's specifications, and the decision becomes less about brand loyalty and more about measurable fit. A well-chosen slimline trickle vent delivers exactly what your home needs: reliable background ventilation that does its job without ever drawing attention to itself.
Slimline trickle vents feature a canopy roughly half the height of standard models, sitting much closer to the window frame surface. While both types provide passive background ventilation, slimline variants are specifically engineered for flush casement windows, heritage frames, and contemporary aluminium profiles where a bulky canopy would disrupt the design. The trade-off is that slimline units typically carry a lower per-unit Equivalent Area (EA) rating, so you may need two slimline vents to match the airflow of a single standard vent in larger rooms.
Yes, retrofitting slimline trickle vents to existing windows is one of the most common applications for these low-profile units. The process involves routing a narrow ventilation slot into the frame head and clipping or screwing the internal and external canopies into place. Slimline models need as little as 18 mm of frame head height, making them viable even on narrower profiles. Before cutting, always check for steel reinforcement in uPVC frames and confirm adequate frame depth. If the frame cannot be modified, glazed-in vents or through-wall ventilation offer alternative solutions.
Slimline trickle vents can fully satisfy Part F requirements, provided the combined Equivalent Area of all vents installed in a room meets the minimum threshold. For multi-storey dwellings, habitable rooms and kitchens need at least 8,000 mm² EQA, while bathrooms require 4,000 mm² EQA. Since slimline models may offer lower per-unit EA ratings due to their compact design, you might need multiple units per room. Always calculate the total EA needed before purchasing and keep product documentation for building control inspection.
Trickle vents should remain at least partially open as a default setting. They are designed to provide continuous background ventilation that prevents moisture buildup, condensation, and mould growth in sealed modern homes. Fully closing them eliminates the passive airflow your dwelling relies on, which can cause humidity to spike and condensation to form on cold window surfaces — especially overnight in bedrooms and during cooking in kitchens. You may temporarily close or reduce the opening during extreme wind or driving rain, but always reopen them once conditions settle.
Yes, acoustic slimline trickle vents incorporate sound-attenuating baffles and labyrinth-style air paths that reduce external noise transfer while still allowing airflow. Look for the Dn,e,w rating — products achieving 50 dB or above are considered high-performance acoustic solutions. These vents are essential for properties near busy roads, railways, or flight paths. Note that acoustic variants may have a slightly larger canopy than non-acoustic slimline models due to the additional baffle material, so check manufacturer dimensions carefully if minimal visual impact is a priority alongside noise control.



 خدمة الإنترنت
 0086 136 3563 2360
 sales@sxalu.com
 +86 136 3563 2360
 العربية
 English
 français
 Deutsch
 русский
 español
 português
 ไทย
ไทย Việt
Việt Українська