
You walk into the kitchen on a cold morning, and the glass is dripping. Water streaks down the pane, pooling on the sill. Is it a bad window? A ventilation problem? Something expensive waiting to happen?
Here is the truth most guides skip: condensation on windows is not a single problem. It is a symptom, and the right way to get rid of it depends entirely on where that moisture appears and what is driving it. Fog on the room-facing side of the glass tells a completely different story than haze trapped between double panes. Treating them the same way wastes time and money.
Understanding what causes window condensation is the first step toward solving it. That is why this guide follows a diagnose-then-solve approach. You will pinpoint your specific condensation type, trace it back to the source, and then work through targeted fixes, starting with changes that cost nothing and progressing to long-term upgrades only when they are genuinely needed.
If your home feels more prone to window condensation than your parents' house ever did, you are not imagining things. Modern construction prioritizes energy efficiency, sealing homes tightly with improved insulation, double-glazed windows, and weatherstripping that dramatically reduces natural air exchange. That is excellent for keeping heating and cooling costs down, but it creates a side effect: moisture-laden air has nowhere to go.
Everyday activities compound the issue. Cooking releases steam, showers saturate bathroom air, and a family of four adds roughly 18 gallons of moisture into indoor air every week just through normal living. Layer in indoor clothes drying, working from home all day with doors and windows shut, and houseplants clustered on sills, and you have a recipe for persistent condensation in the home. As the U.S. EPA notes, a tight, energy-efficient house holds more moisture inside, and homeowners may need active ventilation strategies to compensate.
Rather than jumping straight to product recommendations, this guide walks you through a clear sequence designed for lasting condensation control:
Effective condensation control always addresses the moisture source and the ventilation path, not just the symptom on the glass.
Each step builds on the one before it, so you will know exactly how to get rid of condensation without overspending or overlooking the root cause. The difference between a window that stays clear and one that fogs up again next week almost always comes down to whether you diagnosed the problem correctly in the first place.
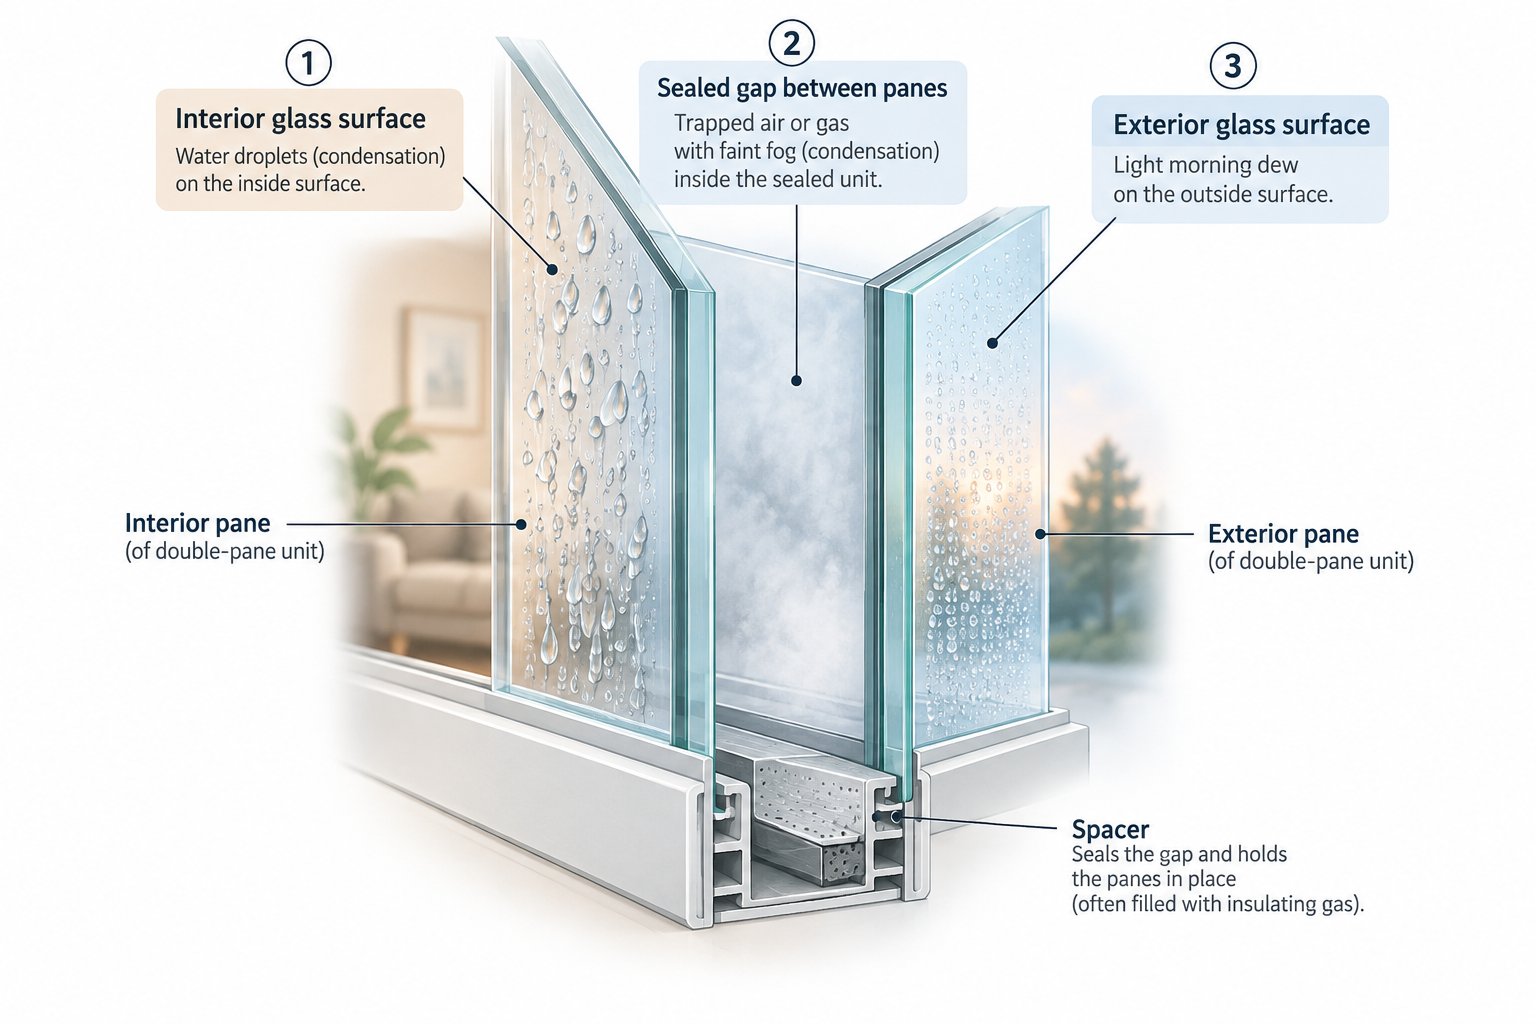
Before reaching for a dehumidifier or shopping for replacement glass, you need to answer one question: where exactly is the moisture showing up? Condensation on glass looks similar no matter where it sits, but the location changes everything about what is causing it and what you should do next. Think of it like a doctor checking whether a cough is in the throat, the chest, or the lungs — same symptom, very different treatment.
There are three distinct types, and each one points to a different fix. A quick visual check — or even a simple wipe with a paper towel — is all it takes to classify yours.
If you are wondering why is there condensation on my windows inside, this is almost certainly the type you are dealing with. Interior surface condensation appears as fog, water droplets, or streaming moisture on the room-facing side of the glass — the surface you can touch from inside the house.
The mechanism is straightforward. Warm, humid air inside your home meets the cold glass surface, and the temperature of that glass drops below the dew point — the threshold at which air can no longer hold its moisture. Water vapor condenses into visible droplets, just like a cold drink "sweats" on a humid day.
This type is worst during winter and overnight, when outdoor temperatures plunge and the inner pane chills significantly. You will often notice it first thing in the morning, especially on north-facing windows that receive no early sun. Bedrooms are frequent trouble spots too, because doors stay closed overnight while occupants breathe out moisture for hours. What causes condensation on the inside of windows nearly always traces back to excess indoor humidity, insufficient ventilation, or glass that does not insulate well enough to stay warm on the interior side.
This one looks different. Instead of water droplets you can wipe away, you will see a persistent foggy, milky, or hazy appearance trapped between the two panes of a double-glazed or triple-glazed window. Try the wipe test: if a paper towel does nothing because the moisture is sandwiched inside the sealed unit, you are dealing with a failed seal.
Here is what happened. Double-pane windows contain a sealed space — typically filled with argon or krypton gas — that acts as an insulating barrier. A desiccant material inside the spacer bar absorbs small amounts of residual moisture. When the perimeter seal degrades over time due to age, UV exposure, or temperature cycling, outside air and humidity infiltrate the gap. The desiccant saturates, and moisture becomes visible. In advanced cases, you may even notice a gritty white residue streaking the inner glass surfaces — that is the desiccant material itself leaching out.
Unlike surface condensation, this problem cannot be solved by adjusting humidity or opening a window. The insulating gas is gone, the unit's thermal performance has dropped back toward single-pane levels, and the glass unit typically needs to be replaced.
Seeing condensation on the outside of your windows can feel alarming, but it is actually a compliment to your glazing. It occurs when the outer pane of a well-insulated window stays cooler than the outdoor dew point — usually on still, humid mornings in spring, fall, or during condensation on windows in summer when air conditioning keeps the interior cool.
Because efficient double glazing prevents indoor heat from warming the outer pane, that glass stays cold enough for outdoor moisture to condense on it. As the BBC Weather team explains, exterior condensation is proof that your windows are doing a good job of keeping heat inside. It evaporates on its own once air temperatures rise or sunlight hits the glass. No action is required, and trying to figure out how to get rid of condensation on outside of windows is usually unnecessary — it is a sign of good insulation, not a flaw.
Use the table below to match what you are seeing with the right course of action. This saves you from applying the wrong fix to the wrong problem.
| Location | Appearance | Cause | Severity Level | Action Required |
|---|---|---|---|---|
| Interior surface (room-facing side) | Water droplets, fog, or streaming moisture you can wipe off | Warm humid indoor air meeting cold glass below the dew point | Low to moderate — cosmetic nuisance, but can lead to mold if ignored | Reduce indoor humidity, improve ventilation, consider insulation upgrades (Steps 2–5) |
| Between panes (inside the sealed unit) | Persistent fog, milky haze, or desiccant residue that cannot be wiped from either side | Failed perimeter seal; inert gas escaped and desiccant saturated | High — insulating performance is compromised | Replace the insulated glass unit (IGU) or the full window (Step 6) |
| Exterior surface (outside-facing side) | Morning dew or light fog on the outer pane that evaporates naturally | Well-insulated glass keeping the outer pane below the outdoor dew point | None — this is a positive sign | No action needed; wipe if desired, but it will clear on its own |
Why is there condensation inside my windows? In most cases, the answer is the first row of this table — interior surface condensation driven by humidity and ventilation issues. That is good news, because it means the solutions are largely within your control. Condensation inside the window that sits between sealed panes, on the other hand, signals a hardware failure that requires a different path entirely.
With your condensation type identified, the next logical question is where all that indoor moisture is actually coming from — and which everyday habits are adding the most water vapor to your air without you realizing it.
Every drop of moisture on windows started somewhere else in your home. A pot boiling on the stove, a hot shower behind a closed door, a load of jeans drying on a radiator — each one pumps water vapor into your indoor air, and that vapor eventually finds the coldest surface it can. Usually, that surface is your glass.
The good news? Targeting these moisture sources is completely free and often reduces condensation in home dramatically — sometimes enough to solve the problem entirely without buying a single product. The key is knowing exactly which activities release the most moisture and pairing each one with a simple behavioral fix.
These three daily activities are responsible for the bulk of indoor humidity. The U.S. Environmental Protection Agency specifically identifies long showers, boiling and steaming during cooking, and drying clothes indoors as major contributors to excess moisture that condenses on cold surfaces like window glass. Here is how to manage each one:
Cooking. Boiling a pot of pasta without a lid releases a surprising volume of steam directly into your kitchen air. The fix is simple: use lids on pots and pans whenever possible, and always turn on your range hood or extractor fan before you start cooking — not halfway through when the windows are already fogged. If your kitchen lacks an extractor, crack a window open a few inches to give steam an exit path.
Showering. A single hot shower can push bathroom humidity well above 90 percent. Run the bathroom extractor fan during your shower and keep it running for at least 15 minutes after you finish. That extra quarter-hour is critical because moisture lingers in the air long after the water shuts off. Keeping the bathroom door closed during and after bathing prevents humid air from migrating into hallways and bedrooms, which is one reason you might notice condensation on bedroom windows even though the bedroom itself feels dry.
Laundry. Drying a single load of wet laundry indoors can release roughly two liters of water into your home's air. Drape that load over a radiator in a sealed room, and you have created ideal conditions for moisture buildup on inside of windows. Whenever possible, dry clothes outdoors or in a tumble dryer vented to the exterior. If indoor drying is your only option, confine clothes to one well-ventilated room with a window cracked open or an extractor running.
The big three get the most attention, but several quieter culprits add up fast — especially overnight when windows are closed and heating drops. You might wonder why is there moisture on the inside of my windows every morning despite not cooking or showering at night. The answer often hides in these overlooked sources:
Breathing and body moisture. A family of four produces roughly two to three liters of moisture overnight just through breathing and perspiration. In a sealed bedroom with the door shut, that vapor has nowhere to go except onto the coldest surface available — the glass. This is exactly what causes moisture in windows of bedrooms more than almost any other room.
Houseplants. Plants release water vapor through transpiration. A few small succulents are not an issue, but a cluster of large, leafy tropical plants grouped near a window creates a localized humidity pocket right at the glass surface. Move moisture-loving plants away from windows that are prone to condensation, or spread them throughout the house rather than concentrating them in one spot.
Unvented gas heaters and portable gas stoves. These appliances produce water vapor as a direct byproduct of combustion. Every kilogram of gas burned generates roughly the same amount of water vapor. If you rely on a portable gas heater, always ensure the room has adequate ventilation and consider switching to an electric alternative in rooms where moisture on inside of house windows is persistent.
Other daily contributors. Aquariums constantly evaporate water. Kettles send plumes of steam into the kitchen. Ironing releases moisture from damp fabric. Even wet pets shaking off after a walk contribute. Individually, each source seems minor, but collectively they can raise indoor humidity by several percentage points.
Use the checklist below to walk through your home room by room and identify which moisture sources are active in your space:
Here is the important takeaway: every item you address on that checklist reduces moisture on windows without costing a cent. Many homeowners discover that simply covering pots, extending fan run-times, and moving laundry outdoors cuts their moisture on inside of windows problem in half. These behavioral changes tackle what causes moisture in windows at the root, before you spend anything on equipment or upgrades.
Still, some homes generate more humidity than behavioral adjustments alone can handle — especially tightly sealed, well-insulated properties where the air itself has no natural escape route. That is where improving your home's airflow becomes the next essential piece of the puzzle.
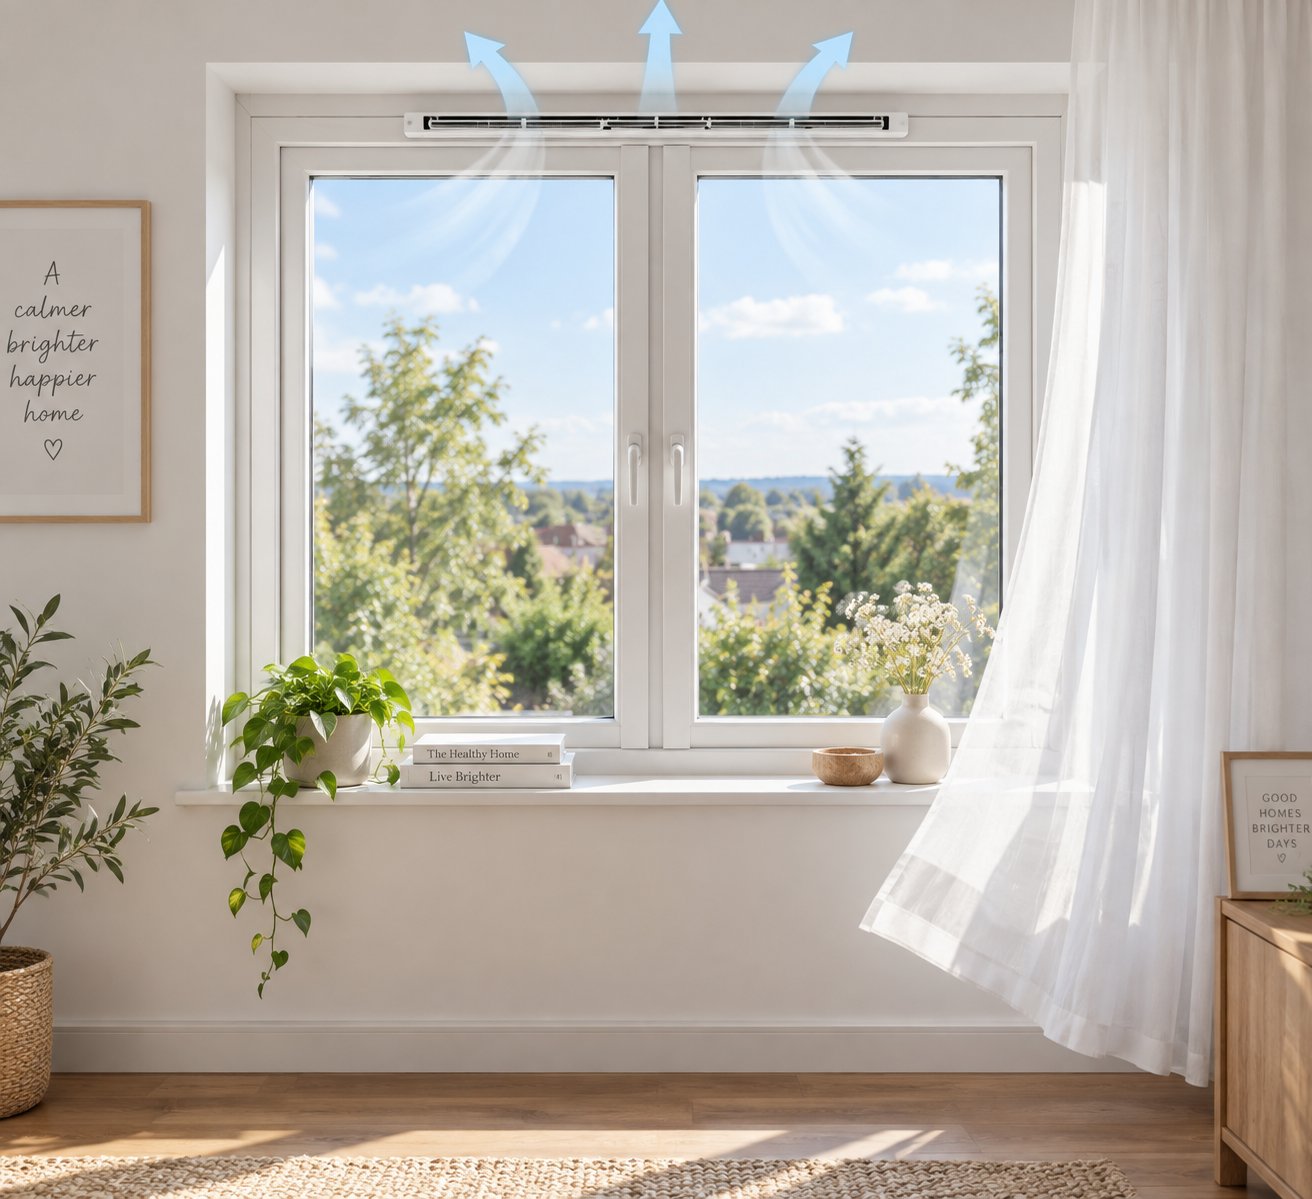
Reducing moisture at the source goes a long way, but in a tightly sealed modern home, even modest indoor humidity can fog your glass if the air has no way out. Ventilation is the single most important structural fix for interior window condensation because it gives water vapor an exit route before it ever reaches the cold pane. Without it, you are fighting a losing battle — wiping windows every morning while the root cause stays untouched.
The good news is that ventilation improvements come in tiers, from completely free techniques you can start today to whole-house systems that handle everything automatically. How do you stop condensation on windows in winter without freezing the house? The answer depends on which tier fits your home and budget.
The fastest way to stop condensation on windows is a technique called purge ventilation. Open windows on opposite sides of your home for five to ten minutes to create a cross-draft that flushes moisture-laden air out and pulls drier outdoor air in. According to ventilation guidance from LAMILUX, cross ventilation can replace all indoor air within two to five minutes, even during winter — far more effective than leaving a single window tilted for hours.
Does this work when it is cold outside? Absolutely. Cold air holds less moisture than warm air, so the incoming air is naturally drier. Walls, furniture, and floors retain their stored heat during a brief purge, meaning the room recovers temperature quickly once you close the windows. The key is to ventilate briefly and intensively — three to four times per day — rather than leaving a window cracked all day, which cools building surfaces without effectively exchanging the air. Turn the heating off while windows are open and switch it back on once they are closed. This costs nothing and can reduce condensation on windows significantly on its own.
Purge ventilation works well as a daily habit, but it relies on you remembering to do it and being home when humidity spikes. Background ventilation solves that gap by providing a controlled, low-level airflow path that operates around the clock without your involvement.
Trickle vents are narrow, adjustable openings built into or added onto the head of a window frame. They allow stale, moist air to escape and fresh outdoor air to trickle in without the heat loss that comes from an open window. Modern building regulations in England — specifically Approved Document F, Volume 1 — require that replacement windows do not make a building's ventilation less satisfactory. In practice, this means trickle vents or equivalent background ventilators must be included when you install new windows, because sealed frames without them trap too much humidity indoors.
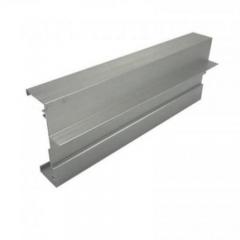
This regulatory emphasis exists for good reason. Trickle vents address the root cause of condensation in sealed homes by restoring the gentle air exchange that older, drafty buildings had naturally — minus the uncomfortable drafts and energy waste. They are available for both aluminium and uPVC window frames and can often be retrofitted to existing windows without replacing the entire unit. For fabricators and homeowners sourcing components, Shengxin Aluminium's uPVC window trickle vent is one example of a background ventilation component designed to fit both aluminium and uPVC frames, making it a practical option for retrofit projects as well as new installations.
A common concern is noise or outdoor pollution entering through the vent. The UK government's FAQ on Approved Document F acknowledges this and recommends noise-attenuating background ventilators for facades facing noisy environments. Trickle vents can also be positioned on the quieter, less polluted side of the building to minimize these issues. Keep them open — closing them defeats the purpose and invites condensation right back.
When a home is highly insulated, exceptionally airtight, or large enough that trickle vents and window opening cannot keep up with moisture production, mechanical ventilation with heat recovery (MVHR) — also known as HRV — is the premium tier. These systems continuously extract stale, humid air from kitchens and bathrooms while supplying filtered, pre-warmed fresh air to living rooms and bedrooms. The heat exchanger inside the unit recovers up to 90 percent of the outgoing heat, so you prevent window condensation without sacrificing energy efficiency.
MVHR is most effective in homes with an airtightness level at or below about 3 air changes per hour at 50 Pascals of pressure. In very drafty properties, wind and thermal stacking already ventilate the building through gaps in the envelope, reducing the benefit of a mechanical system. For older homes that sit well above that threshold, investing in improved airtightness and insulation first — then adding MVHR — delivers far better results than installing the system into a leaky shell.
The cost and complexity are real: professional design, ductwork throughout the home, and careful commissioning are all essential. MVHR is best considered early in a renovation or new-build project rather than as a quick retrofit. Still, for the right property, it is the most comprehensive way to prevent condensation on windows while maintaining excellent indoor air quality year-round.
Use the ranking below to decide which level of ventilation improvement fits your situation. Each tier builds on the one before it:
Most homeowners will find that combining tiers one and two — regular purge ventilation plus properly functioning trickle vents — is enough to dramatically reduce condensation on windows. Tier three targets the specific rooms where moisture spikes hardest. Tier four is the long-term solution for homes built to high energy-efficiency standards where the envelope is intentionally sealed tight.
Improving airflow tackles the ventilation side of the equation, but some homes produce humidity faster than even good ventilation can clear it. In those situations, actively pulling moisture out of the air with a dehumidifier becomes a valuable middle-ground tool — especially while longer-term ventilation upgrades are still in progress.
Ventilation moves humid air out. A dehumidifier pulls moisture directly from the air that stays behind. When your home produces humidity faster than windows, trickle vents, and extractor fans can clear it — or when structural ventilation upgrades are months away — a dehumidifier for window condensation fills that gap immediately.
That said, a dehumidifier is a tool, not a cure. It treats the symptom (excess humidity in the room) effectively, but it does not replace the ventilation improvements covered in the previous step. Think of it as a powerful ally that buys you time and keeps your glass dry while you address the deeper causes.
Not every condensation problem calls for a dehumidifier. So when does it make sense? Consider one if any of the following apply to your situation:
In each of these scenarios, a window dehumidifier setup acts as a reliable condensation absorber for windows by keeping the room's relative humidity within the 40 to 60 percent sweet spot where moisture simply cannot condense on reasonably insulated glass. An inexpensive digital hygrometer — available for as little as $10, as Consumer Reports recommends — lets you measure your starting point and track progress.
Walk into a store or search online and you will find dozens of models. The two decisions that matter most are type and capacity.
Refrigerant (compressor) dehumidifiers work like a miniature air conditioner. They draw air over cold coils, moisture condenses on the coils, and drier air blows back into the room. These units perform best in warmer environments — generally above 68 °F (20 °C) — and are the most energy-efficient option for living rooms, kitchens, and open-plan areas where temperatures stay comfortable. The trade-off is that they can be bulkier and louder than their desiccant counterparts, and their performance drops in cooler rooms because the coils can frost over.
Desiccant dehumidifiers use a moisture-absorbing material rather than refrigerated coils, which means they work efficiently regardless of room temperature. They are lighter, quieter — as low as 35 dB compared to 45 dB or more for compressor models — and ideal for unheated spaces such as bedrooms at night, garages, and basements where dehumidifier condensation from chilled coils could be an issue. They do consume more energy, but the gentle warmth they release (roughly 5–9 °F above ambient) doubles as supplemental heating in winter, partly offsetting the higher running cost.
Sizing the unit to your room is where many buyers go wrong. An undersized dehumidifier will run constantly without bringing humidity down to the target range. A dehumidifier sizing chart from Consumer Reports based on Department of Energy labeling standards offers a practical framework:
| Room Size | Slightly Damp (50–60% RH) | Moderately Damp (60–70% RH) | Very Damp (70–80% RH) | Wet (80–90% RH) |
|---|---|---|---|---|
| 400 sq ft | 20-pint | 20-pint | 25-pint | 30-pint |
| 600 sq ft | 25-pint | 30-pint | 35-pint | 40-pint |
| 800 sq ft | 35-pint | 40-pint | 45-pint | 50-pint |
| 1,200 sq ft | 50-pint | 50-pint | 55-pint | 60-pint |
As a quick rule: a small-capacity unit (under 30 pints per day) suits a single bedroom or small study. A medium-capacity unit (30–39 pints) handles moderately damp rooms of 600 to 800 square feet. A large-capacity unit (50 pints and up) is the right choice for open-plan living areas, basements, or any space over 1,200 square feet. If the room shows visible condensation windows dehumidifier experts like CR's testing engineer Misha Kollontai advise sizing up: "If, at full power, your dehumidifier is only pulling your humidity down to 60 or 70 percent, you need a bigger dehumidifier."
Whichever type and size you choose, look for a model with a built-in hygrostat (sometimes called a humidistat). This sensor lets the unit cycle on and off automatically to maintain your target humidity — typically between 40 and 50 percent in winter and up to 60 percent in warmer months. Without a hygrostat, the unit runs until you switch it off manually, wasting energy and potentially over-drying the air.
Where you position the dehumidifier matters almost as much as which one you buy. Place it centrally in the room rather than tucked into a corner, and keep it at least a foot away from walls and furniture so air flows freely into the intake and out through the exhaust. Most models vent from the top, but a few vent from the side — check your unit and plan placement accordingly.
Close windows and doors in the room while the dehumidifier runs. This sounds counterintuitive after a whole chapter on ventilation, but the logic is simple: you are trying to dry the trapped air, not dehumidify the entire outdoors. Once the unit cycles off and humidity is at target, you can resume your normal ventilation routine.
Maintenance is minimal but essential for consistent dehumidifier condensation performance:
Before you order, run through this quick list to make sure you are choosing the right unit for dehumidifier window condensation control:
A well-chosen dehumidifier keeps indoor humidity in the safe zone and dramatically reduces morning fog on your glass. It is one of the most effective ways to stop condensation inside windows quickly — especially in rooms where ventilation alone falls short. Still, controlling humidity is only half of the thermal equation. The glass itself plays a major role in whether moisture condenses, and upgrading window insulation and seals can raise the surface temperature of the pane enough to eliminate the trigger entirely.
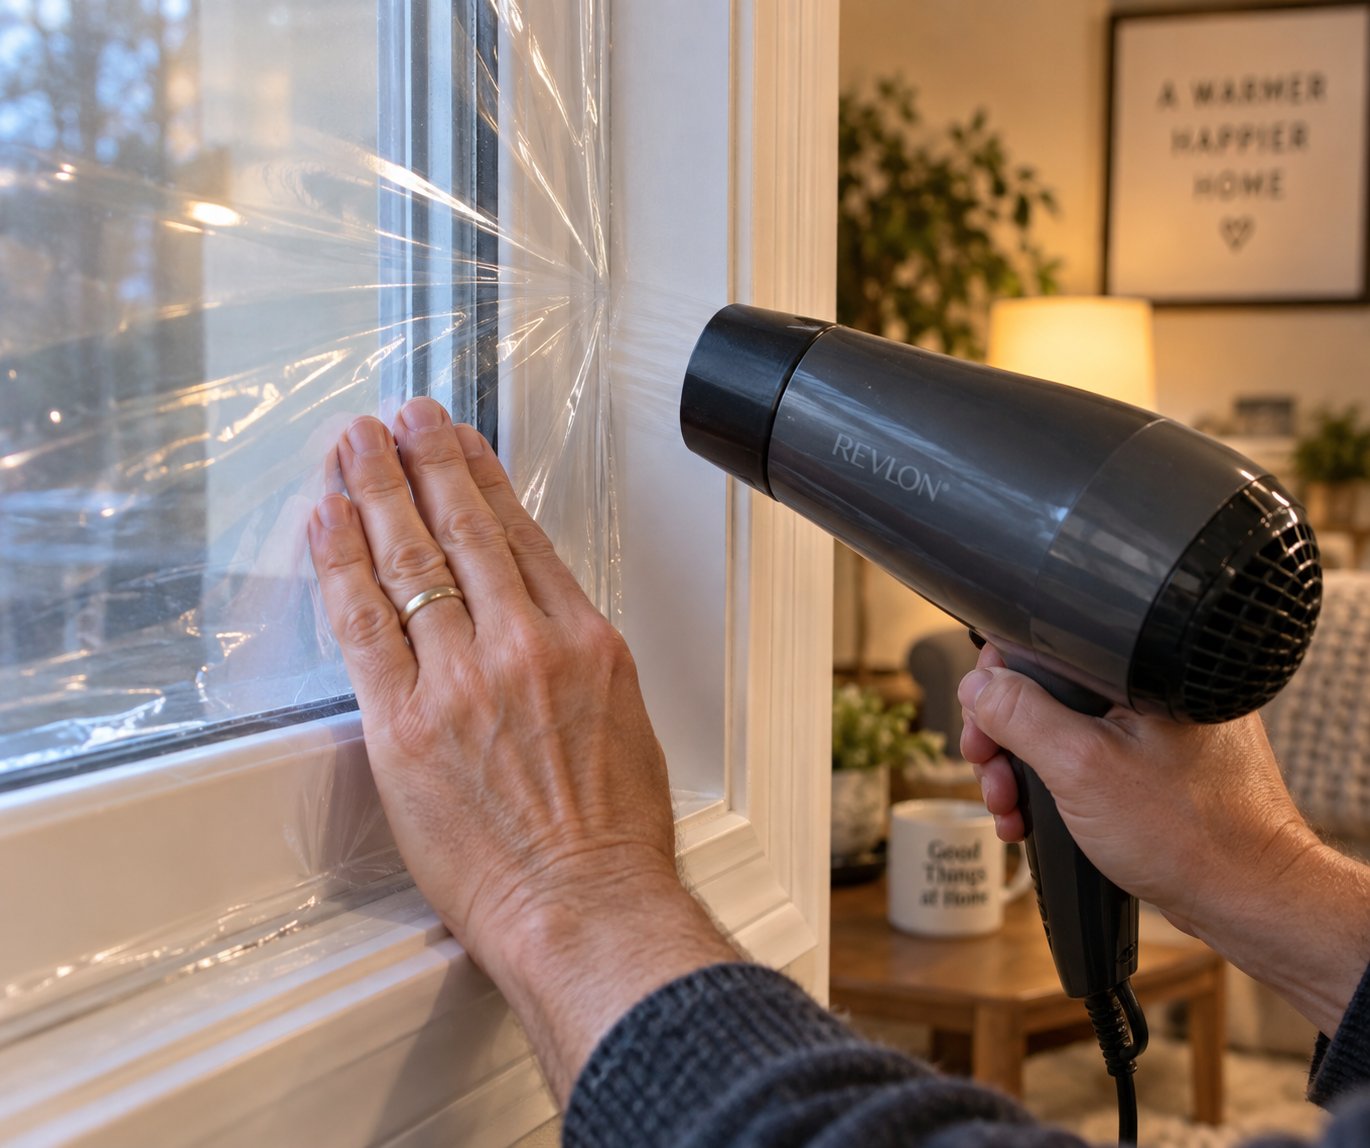
Humidity is under control. Ventilation is improved. Yet every cold morning, moisture still creeps across the glass. Why? Because the pane itself is too cold. When the inner surface of your window drops below the dew point of the room's air, no amount of behavioral change will keep that glass dry. The fix at this stage is raising the temperature of the surface where condensation forms — and that means upgrading the thermal performance of the window itself.
Several mid-range solutions sit between free behavioral changes and a full window replacement. Each one tackles condensation on interior windows from a slightly different angle, and understanding which approach matches your situation is the difference between a lasting window condensation fix and wasted effort.
Imagine adding a second layer of glazing to your window for under $20. That is essentially what heat-shrink window insulation film does. A sheet of clear plastic is stretched across the interior of the window frame, creating a trapped pocket of still air between the film and the glass. That dead air space acts as an insulating buffer — raising the temperature of the surface you are actually exposed to by 8 to 15 degrees Fahrenheit compared to bare glass. In many homes, that increase alone is enough to push the surface above the dew point, and condensation on inside of windows in winter essentially disappears.
The mechanism is thermal bridging prevention, not just draft blocking. A standard single-pane window has an R-value around R-1. Adding a properly installed shrink-film kit roughly doubles that to R-2 or R-3, depending on the air gap depth. Double-pane windows benefit too — the film adds another insulating layer on top of the sealed unit's existing performance.
Application is straightforward, but technique matters more than most people expect:
A taut, wrinkle-free film with a complete perimeter seal is the goal. Get that right, and you have created a miniature secondary glazing system for a fraction of the cost. Most kits last one full heating season — roughly five to six months — before the adhesive degrades and needs replacing.
Cold air sneaking through worn or missing seals does more than create drafts. It chills the glass and frame from the outside in, dropping surface temperatures right into the condensation zone. Even a well-insulated double-pane window will fog up if gaps around the sash let frigid air wash across the inner pane. One energy analysis estimates that a single drafty window can reduce heating efficiency by up to 30 percent — and every degree of heat lost at the glass edge makes condensation more likely.
Replacing or adding weatherstripping is one of the most cost-effective ways to fix condensation on windows, and most homeowners can do it in under an hour per window. Here are the main options:
Before applying any new stripping, remove old, cracked material completely and clean the surface with soap and water. Let it dry fully — adhesive applied to a damp frame peels off within weeks. The goal is a snug seal that compresses slightly when the window is closed but does not make the sash difficult to operate. Seal only the moving joints; never caulk a window sash shut, as you will crack the seal with the first opening and lose the ability to ventilate.
If your home still has single-glazed windows — common in older properties, listed buildings, or rental apartments where full replacement is not an option — secondary glazing bridges the gap between insulation film and a brand-new double-pane unit. It involves adding a separate panel of glass or acrylic on the room side of the existing window, creating an insulating air gap similar to double glazing but without altering the original frame.
Modern secondary glazing comes in several forms. Magnetic panels snap onto steel strips bonded to the frame, making them easy to remove for cleaning or summer storage. Clip-on acrylic sheets achieve the same effect at a lower price point. Sliding-track systems suit larger windows and allow the secondary panel to open independently. Secondary glazing offers good insulation combined with better ventilation flexibility than sealed double-pane units, since many systems include built-in vents or can be opened separately from the primary window.
For condensation control specifically, secondary glazing works by keeping warm indoor air away from the cold single pane. The inner acrylic or glass panel stays closer to room temperature, so moisture condenses on it far less readily. It will not match the thermal performance of a modern argon-filled double-glazed unit, but it is significantly cheaper and often requires no planning permission — making it the practical middle ground for how to remove condensation on windows in properties where replacement glazing is not feasible.
You will find anti-condensation sprays on the shelves of most home improvement stores, and the promise is appealing: spray the glass, and water droplets stop forming. The reality is more nuanced. These products are surfactant-based coatings that reduce the surface tension of water on glass. Instead of forming visible droplets, moisture spreads into a thin, transparent sheet that runs off the pane. The glass looks clear, and the sill stays drier.
What these sprays do not do is reduce indoor humidity. The same volume of moisture is still in your air — it simply behaves differently when it contacts the treated glass. That makes anti condensation spray for windows a symptom manager rather than a root-cause solution. It is useful as a quick cosmetic fix in guest rooms before visitors arrive or on mirrors in steamy bathrooms, but relying on it as your primary strategy leaves the underlying humidity and ventilation issues untouched.
Most sprays need reapplying every one to four weeks depending on the product and how often the glass is cleaned. Some leave a slight residue that builds up over time and requires a vinegar or alcohol wipe to remove before recoating.
Use the list below to compare these mid-range solutions and decide how to remove window condensation in your specific situation:
Each of these upgrades helps how to prevent window condensation in a different way — film and secondary glazing raise surface temperature, weatherstripping blocks cold-air infiltration, and sprays manage the visual symptom. For maximum effect, combine two or more: for example, weatherstrip the frame to stop drafts, then apply insulation film to boost the glass temperature. That layered approach often rivals the condensation performance of a new double-glazed unit at a fraction of the price.
These insulation and seal improvements handle surface condensation effectively. But what happens when the moisture is not on the surface at all — when it is trapped inside the sealed unit, fogging the view from both sides and signaling a problem no amount of film or weatherstripping can reach?
Mist inside windows that you cannot wipe away from either side is one of the most frustrating home maintenance problems. You clean the glass, check again an hour later, and the same cloudy haze is still there — because the moisture is sealed inside the unit where no cloth can reach it. Unlike surface condensation, which responds to humidity control and better ventilation, window condensation inside a sealed double-pane unit signals a hardware failure that requires a different approach entirely.
So how do you get condensation out of a window when it is trapped between the panes? The honest answer is that you cannot simply vent it or wipe it away. You need to understand what has failed, assess the damage, and choose between targeted glass replacement and a full window swap.
Before spending money, make sure you are actually dealing with seal failure rather than heavy surface condensation on one side. Run through these checks:
If your windows show any combination of these signs, the perimeter seal has broken down, the inert gas fill (typically argon) has escaped, and outside humidity has infiltrated the cavity. The unit can no longer insulate properly, and the problem will only worsen over time.
The question most homeowners ask first is whether they can simply reseal the unit and move on. Unfortunately, once the seal has failed and moisture has entered, the unit cannot be effectively repaired at home. The desiccant is saturated and will not regenerate, the insulating gas is gone, and any attempt to drill into the glass to vent moisture compromises both structural integrity and thermal performance.
You may come across companies offering "defogging" services that drill small holes, flush the cavity, and plug it. While this can temporarily clear the mist inside windows, it is generally considered a short-term fix. The insulating gas is not restored, the original seal failure remains, and most industry professionals note that fog typically returns within a few years. It can, however, buy time if replacement is not in the budget immediately.
The two realistic long-term paths are:
How do you decide between the two? Inspect the frame carefully. Open and close the window to check for stiffness or misalignment. Look for soft spots in timber frames, cracks in uPVC corners, and visible corrosion on metal components. If the frame operates smoothly and shows no structural issues, an IGU-only swap is almost always the smarter financial move.
Sometimes how to get condensation out of windows is not really the right question — the real question is whether the window has reached the end of its useful life. Full replacement becomes the better long-term value in a few specific scenarios:
Replacing windows is a significant investment, but it is also the most comprehensive way to eliminate window inside condensation permanently. Modern units with low-emissivity coatings, argon or krypton gas fills, and warm-edge spacer bars keep the inner pane warm enough that interior surface condensation rarely forms under normal humidity levels.
Whether you opt for an IGU swap or full replacement, the key takeaway is that condensation trapped between panes is a sealed-unit problem — not a humidity or ventilation problem. It requires a different category of solution than everything covered in the previous steps. With that distinction clear, the natural next question is how all of these fixes — from free behavioral changes to professional-grade replacements — stack up against each other in terms of cost, effort, and real-world effectiveness.
Ten different fixes have been covered across six steps — from opening a window to ripping one out entirely. Each tackles condensation from a different angle, at a different price point, with a different level of effort. The challenge is not a lack of options. It is knowing which option actually solves your problem without overspending or under-delivering.
That is exactly what this section sorts out. The comparison table below lays every condensation on windows solution side by side so you can see, at a glance, what each one costs, how much work it takes, how effective it is, and — critically — whether it addresses the root cause of moisture on your glass or merely manages the visible symptom.
Use this table as your decision-making shortcut. Solutions are ordered to reflect the progression from background ventilation and free behavioral changes through to professional-grade upgrades. If you are wondering how to reduce condensation on windows without trial and error, start here.
| Solution | Estimated Cost | Effort Level | Effectiveness | Addresses Root Cause? |
|---|---|---|---|---|
| Trickle vent installation | Low to moderate | Easy (retrofit) to moderate (new install) | High | Yes — restores continuous air exchange in sealed homes |
| Behavioral changes (lids on pots, extractor fan use, moving laundry outdoors) | Free | Easy | Medium to high | Yes — reduces moisture production at the source |
| Dehumidifier | Low to moderate ($150–$400+ depending on capacity) | Easy | High | Partially — removes airborne moisture but does not fix ventilation gaps |
| Window insulation film | Low (under $20 per window) | Easy | Medium to high | Partially — raises glass surface temperature but does not reduce humidity |
| Weatherstripping | Low ($10–$25 per window) | Easy | Medium | Partially — blocks cold-air infiltration that chills the glass |
| Anti-condensation spray | Low (under $15) | Easy | Low | No — manages the visual symptom only; humidity remains unchanged |
| IGU replacement (insulated glass unit swap) | Medium ($150–$400+ per unit) | Professional | High | Yes — restores thermal performance and gas fill in the sealed unit |
| Secondary glazing | Medium ($75–$200+ per window) | Moderate | Medium to high | Partially — adds insulating air gap but does not address ventilation |
| Full window replacement | High ($300–$1,000+ per window) | Professional | Very high | Yes — modern glazing, thermal breaks, and integrated ventilation in one upgrade |
| Whole-house MVHR (mechanical ventilation with heat recovery) | High ($3,000–$8,000+ installed) | Professional | Very high | Yes — continuously exchanges air while recovering heat |
A few patterns jump out immediately. The solutions that address root causes — ventilation and thermal performance — cluster at either end of the cost spectrum. Free behavioral changes and low-cost trickle vents sit at the top, while full window replacement and MVHR sit at the bottom. Everything in between offers partial relief. Anti-condensation spray, for instance, is the cheapest product you can buy, but it scores lowest on effectiveness and does nothing about the underlying moisture. That does not make it useless — it makes it a tactical tool for specific situations, not a strategy.
Notice, too, that how to eliminate condensation on windows permanently almost always involves combining two or more rows from this table rather than relying on a single fix. A dehumidifier paired with trickle vents covers both the humidity side and the ventilation side. Weatherstripping combined with insulation film raises the glass temperature while blocking the cold-air infiltration that drops it. No single solution handles every variable on its own.
With ten options on the table, the best path forward depends on three things: who you are, what type of condensation you diagnosed in Step 1, and what you can realistically change about your property. Here is a decision framework tailored to the most common situations.
Renters and tenants. You likely cannot modify window frames, install trickle vents, or replace glazing without landlord approval. Focus on the solutions you control: behavioral changes (Step 2), a portable dehumidifier sized to your room, and window insulation film for the worst-affected windows during winter. These three together cost under $200 total and can cut interior condensation dramatically. If mold is already developing around frames, document the issue and report it to your landlord or property manager — the U.S. EPA recommends that renters report persistent moisture problems to building owners promptly, as mold remediation is typically the owner's responsibility.
Homeowners with newer, well-sealed homes. Your property is energy-efficient but likely over-sealed — exactly the scenario described in Step 1. Background ventilation is your priority. If your windows lack trickle vents, retrofitting them is one of the most cost-effective moves on the entire table: low upfront cost, easy installation on existing frames, and a direct fix for the root cause. Components like Shengxin Aluminium's uPVC trickle vent are designed for both aluminium and uPVC frames, making them a practical starting point for fabricators or homeowners sourcing parts for a retrofit. Pair trickle vents with consistent purge ventilation habits, and most newer homes will see condensation drop to negligible levels without any further investment.
Owners of older homes with single glazing. Single-pane glass is inherently cold, and no amount of ventilation will make it warm enough to prevent condensation entirely on bitter nights. Secondary glazing is the practical middle ground — it adds meaningful thermal insulation without replacing the original windows, which is particularly valuable in listed or heritage properties. If the frames are in good condition, secondary glazing panels can deliver years of service. If the frames are deteriorated, full replacement with modern double or triple glazing is the more cost-effective long-term path, especially when the new windows include integrated trickle vents for continuous background ventilation.
Condensation trapped between panes. This is a hardware problem, not a humidity problem. The comparison table confirms it: no behavioral change, dehumidifier, or spray will clear mist from inside a failed sealed unit. Your options narrow to two rows — IGU replacement or full window replacement — depending on the condition of the frame. If the frame is sound, swapping just the glass unit can save up to 50 percent compared to a full window swap. If multiple units have failed or frames show damage, replacing everything at once avoids paying twice.
Highly insulated or passive-standard homes. These properties are sealed so tightly that passive ventilation — even with trickle vents — may not keep up with moisture production. A whole-house MVHR system is the premium answer here, recovering up to 90 percent of outgoing heat while continuously supplying fresh, filtered air. The upfront cost is significant, but in a home designed for airtightness, MVHR is not a luxury — it is the ventilation strategy the building envelope was designed to work with.
How to combat condensation effectively comes down to matching the solution to the diagnosis. A renter spending $300 on a dehumidifier solves the immediate problem. A homeowner adding $50 worth of trickle vents solves the structural one. A family replacing 20-year-old double glazing solves both at once and gains energy savings that offset the investment over time. The worst approach is guessing — and with the table above, you do not have to.
Choosing the right fix is the strategic part. Maintaining it is the daily part. Even the most effective upgrade loses its edge if trickle vents get taped shut, dehumidifiers sit unplugged, or mold gets a foothold before anyone notices. The final step is building habits that keep condensation away for good — and knowing when the signs on your glass are telling you something more serious is happening behind the wall.

A little fog on the glass each morning is a nuisance. Mold on windows from condensation, peeling paint around the frame, or a musty smell that lingers no matter how often you clean — that is a warning. The difference between a cosmetic annoyance and a genuine structural or health threat often comes down to a few visual cues that most homeowners overlook until damage is already underway.
This final step gives you two things: a clear list of red flags that mean condensation has crossed the line from minor inconvenience to serious problem, and a simple daily routine that keeps your windows clear long after you have applied the fixes from the previous steps.
Surface condensation that gets wiped away each morning and does not return until the next cold night is manageable. The moment you notice any of the following, the situation has escalated beyond routine moisture management:
Any of these signs may indicate that condensation and mould on windows has progressed into a broader moisture problem requiring professional assessment. Mold condensation windows issues left unchecked can escalate quickly: one window company reports seeing repair costs exceed $10,000 when hidden rot behind drywall goes undetected.
The fixes from Steps 2 through 7 solve the problem. These daily habits keep it solved. Think of them as maintenance for your indoor climate — small, repeatable actions that prevent moisture from creeping back.
How to stop condensation on windows overnight often comes down to the combination of these last three habits: keep trickle vents open, maintain gentle background heat, and ensure bedrooms are not sealed boxes. A door left slightly ajar or a trickle vent doing its job is often the difference between dry glass in the morning and a soggy sill.
DIY fixes handle the majority of how to avoid condensation on windows in winter — behavioral changes, trickle vents, dehumidifiers, and insulation upgrades are well within a homeowner's reach. There are scenarios, however, where professional intervention is not optional:
The best condensation strategy combines reducing moisture at the source, maintaining continuous background ventilation, and ensuring your windows provide adequate thermal insulation.
That single principle ties together every step in this guide. How to stop condensation on windows in winter is not about finding one magic product — it is about closing the gap between the moisture your home produces, the air exchange your ventilation provides, and the thermal performance your glass delivers. Address all three, build the daily habits that maintain them, and your windows stay clear — not just tomorrow morning, but through every cold season ahead.
Morning condensation forms because overnight temperatures drop the inner glass surface below the dew point while occupants release moisture through breathing and perspiration. A family of four can produce two to three liters of moisture overnight in a sealed bedroom. Keeping trickle vents open, leaving the bedroom door slightly ajar, and maintaining gentle background heating prevents the glass from getting cold enough for vapor to condense. Wiping the glass each morning before water drips into the frame channel also stops mold from gaining a foothold.
Interior condensation appears on the room-facing side and is caused by high indoor humidity meeting cold glass — it can be wiped away and is fixed through ventilation and moisture control. Condensation between double panes indicates a failed perimeter seal where the insulating gas has escaped; it cannot be wiped and typically requires replacing the insulated glass unit or the entire window. Exterior condensation on the outside surface is actually harmless and signals that your glazing is well-insulated, as the outer pane stays cooler than the outdoor dew point. It clears naturally as temperatures rise.
Yes, trickle vents are one of the most effective and affordable long-term solutions for interior window condensation in sealed modern homes. They provide continuous low-level airflow that allows stale, moisture-laden air to escape without significant heat loss. Modern building regulations in England require background ventilation when replacement windows are installed for exactly this reason. Trickle vents are available for both aluminium and uPVC frames and can often be retrofitted to existing windows. Components such as Shengxin Aluminium's uPVC window trickle vent are designed to fit both frame types, making them practical for retrofit projects and new installations alike.
A dehumidifier effectively removes excess moisture from indoor air and can stop condensation from forming on glass when it keeps relative humidity between 40 and 60 percent. However, it treats the symptom rather than the root cause. It works best as a medium-term tool alongside ventilation improvements, or as a permanent fixture in rooms where structural changes are not feasible — such as windowless bathrooms, basements, or rental properties. For lasting results, pair a correctly sized dehumidifier with background ventilation like trickle vents and consistent daily habits such as running extractor fans after cooking and showering.
Professional help is warranted when condensation has progressed beyond a cosmetic issue into visible damage or health risk. Key warning signs include black mold growth around window frames or on adjacent walls, peeling paint or bubbling wallpaper near windows, soft or rotting timber frames, a persistent musty smell, and condensation appearing on interior walls rather than just glass. If mold keeps returning despite improved ventilation and humidity control, the moisture source may be structural — a hidden leak, failed external caulking, or a bridged cavity wall — and requires an independent building surveyor for proper diagnosis.



 خدمة الإنترنت
 0086 136 3563 2360
 sales@sxalu.com
 +86 136 3563 2360
 العربية
 English
 français
 Deutsch
 русский
 español
 português
 ไทย
ไทย Việt
Việt Українська