Ever walked into a stuffy room and immediately felt the need to crack open a window? You're not alone. Fresh air matters more than most people realize, and that's exactly where an adjustable window ventilator comes into play. This simple yet effective device transforms how buildings breathe, offering controlled airflow without the complexity of powered systems or expensive HVAC upgrades.
Think of it as giving your windows the ability to breathe on their own terms. Whether you're dealing with a humid bathroom, a stuffy bedroom, or a commercial space that needs consistent air exchange, these ventilators provide a practical solution that works around the clock.
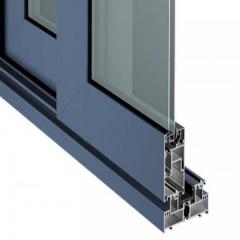
An adjustable window ventilator is a mechanical ventilation solution designed to fit directly into window frames, allowing occupants to regulate the flow of fresh outdoor air into indoor spaces. Unlike powered exhaust fans or complex ductwork systems, this type of window air vent operates passively, relying on natural pressure differences between indoor and outdoor environments to move air.
The basic operating principle is straightforward. Most units feature louvers or sliding mechanisms that open and close to control airflow volume. Manual versions let you adjust the ventilation window opening with a simple slider, giving you complete control over how much fresh air enters the room. Automatic models take this further by responding to changes in temperature, humidity, or air pressure, adjusting airflow rates without any input from you.
According to Plastixal, these devices are typically installed in the upper portion of window frames, where they enhance the operation of gravity ventilation while maintaining a continuous air exchange even when window sashes remain tightly closed. This positioning takes advantage of natural convection, as warm air rises and escapes while cooler fresh air enters lower in the space.
Here's a fact that might surprise you. According to the U.S. Environmental Protection Agency, Americans spend approximately 90 percent of their time indoors, where pollutant concentrations can be 2 to 5 times higher than typical outdoor levels. Stale air, humidity buildup, and accumulated pollutants don't just make spaces uncomfortable; they directly impact health and wellbeing.
Energy-efficient building construction, while excellent for reducing heating and cooling costs, often creates tighter building envelopes that trap pollutants inside. Without adequate air exchange, volatile organic compounds from cleaning products, off-gassing from furniture, and moisture from daily activities accumulate to problematic levels. The EPA notes that health effects can range from eye and throat irritation to respiratory diseases and even more serious conditions.
An adjustable ventilator addresses these concerns without requiring electricity or complex window ducting installations. By providing consistent background ventilation, these devices offer an energy-efficient alternative to powered mechanical systems while still maintaining healthy indoor air quality.
The primary benefits of installing a window ventilator include:
For properties already equipped with gravity ventilation systems, adding window ducting through adjustable ventilators significantly enhances performance. However, if your building uses air conditioning or mechanical ventilation with heat recovery, these passive devices may be unnecessary since those systems already manage air exchange actively.
Now that you understand why ventilation matters, the next question becomes: which type of adjustable window ventilator actually fits your situation? Walk into any hardware store or browse online, and you'll find dozens of options that all look similar but perform quite differently. Understanding these categories helps you make a confident choice rather than gambling on whatever appears first in search results.
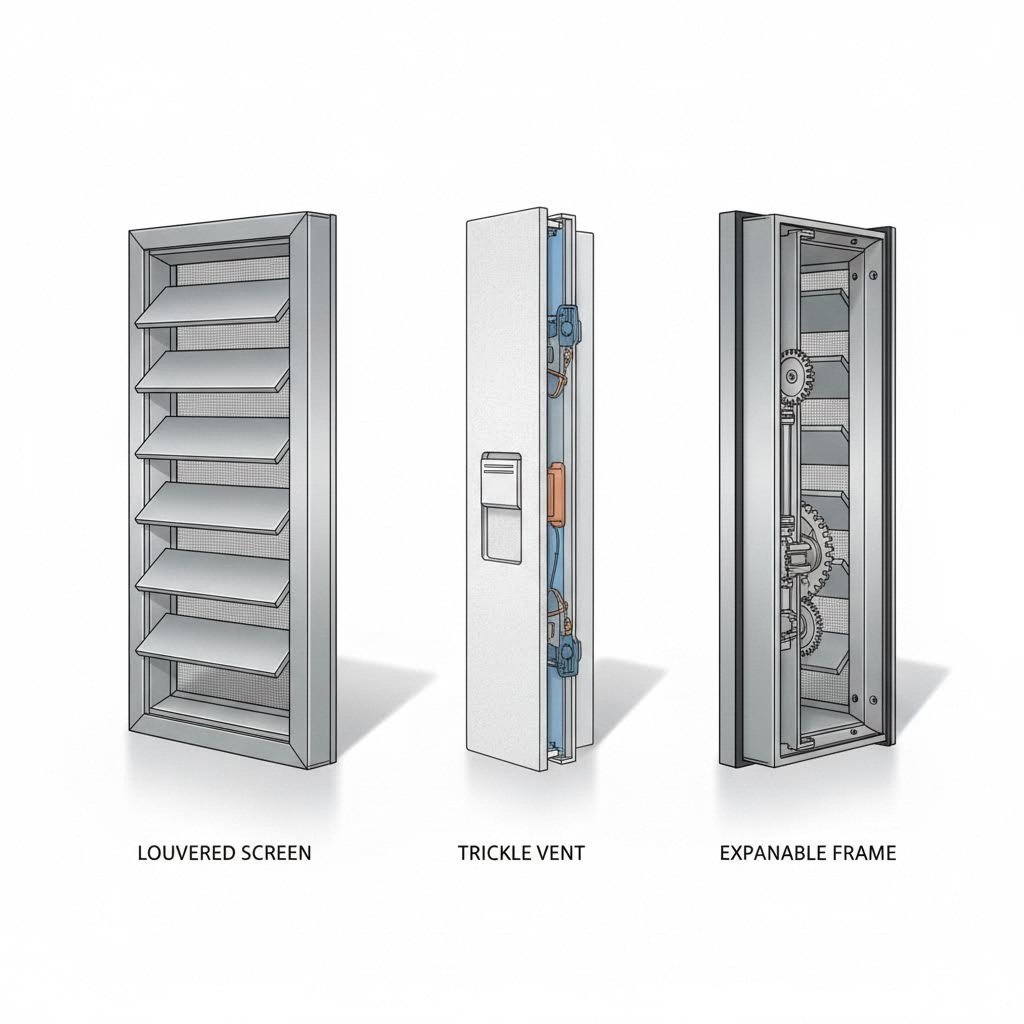
Each ventilator style serves specific purposes, and matching the right type to your needs saves both money and frustration. Let's break down the three main categories you'll encounter when shopping for an adjustable screen for windows.
Imagine a series of angled slats arranged like the blades of window blinds. That's essentially how louvered window screens work. According to Aire-Renaissance, these angled blades are positioned horizontally or vertically to allow air to pass through while deflecting moisture and debris. The genius of this design lies in its simplicity: airflow continues unimpeded, but rain, insects, and larger particles simply can't navigate the angles.
When evaluating louvered screen ventilators, material choice significantly impacts long-term performance. Here's what you should know:
Metal louvers (typically aluminum or stainless steel) offer superior durability and weather resistance. Aluminum provides an optimal balance of lightweight strength and corrosion resistance, making it ideal for coastal areas or regions with harsh weather. These materials hold their shape over years of use and resist warping from temperature fluctuations.
Plastic louvers cost less initially but may degrade faster under UV exposure. They're adequate for sheltered locations or temporary installations, but expect reduced lifespan in direct sunlight. Some premium plastic options include UV stabilizers that extend durability, so check specifications before dismissing them entirely.
Advanced louvered designs, similar to those used in commercial applications like marvin window screens, often feature internal gutter systems that capture and redirect rainwater. This prevents the "cascading waterfall effect" that can occur during heavy storms, keeping your interior dry even when ventilation remains active.
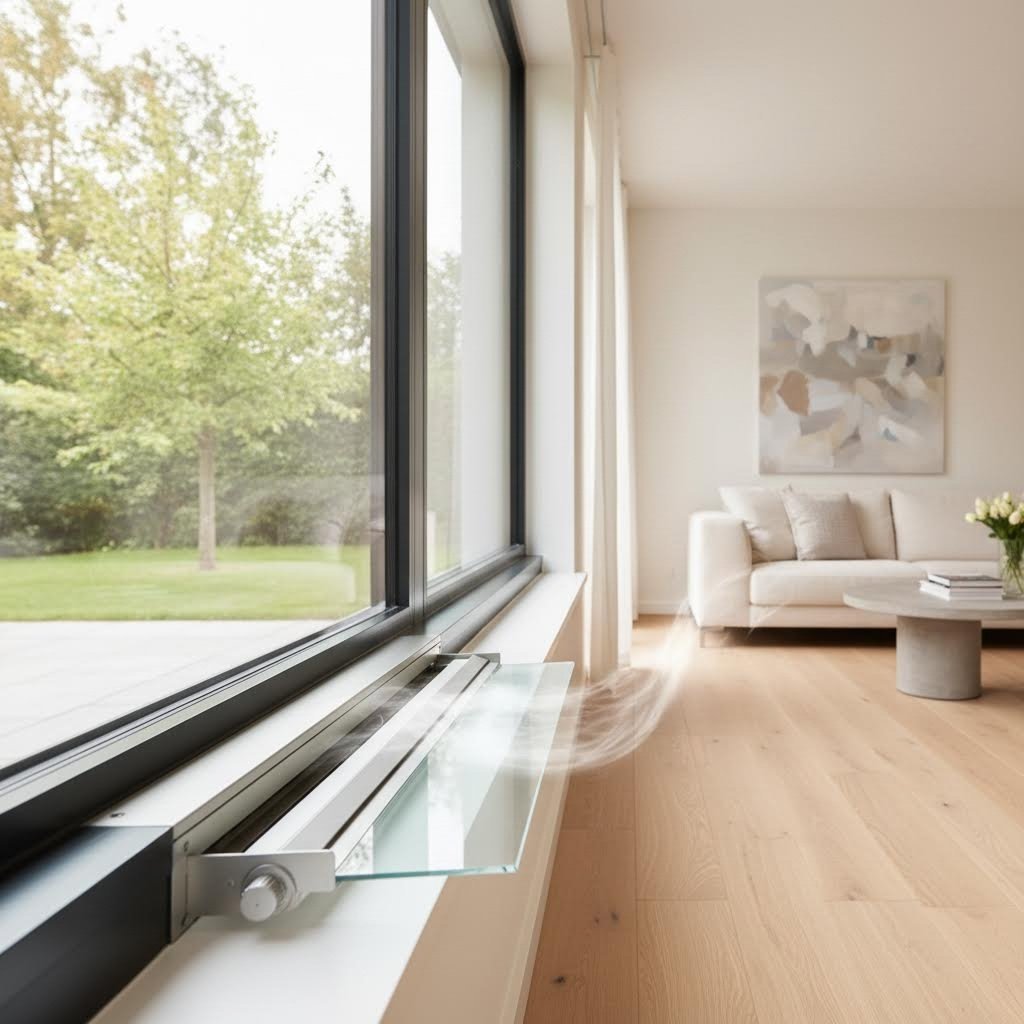
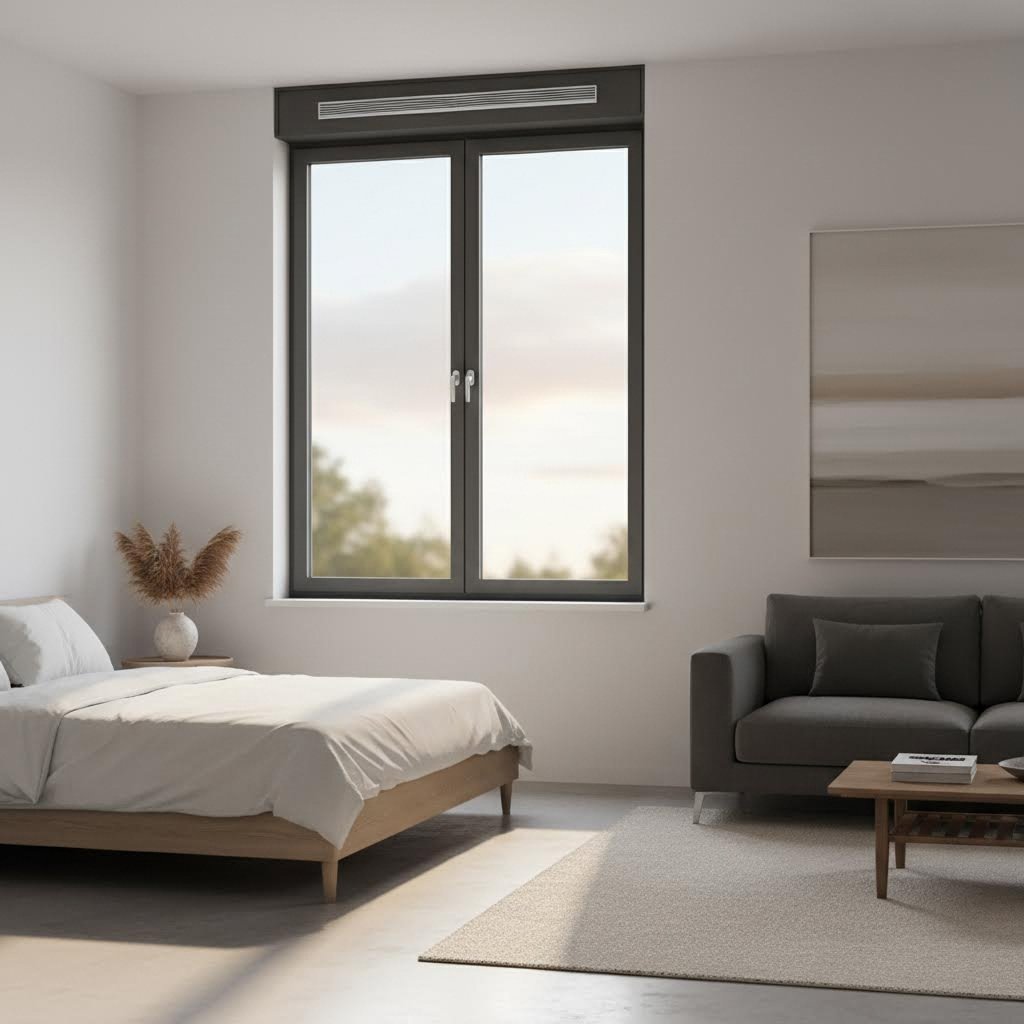
What if you need ventilation that's practically invisible? Trickle vents answer that question with a low-profile design that disappears into your window frame. According to Durajoin, these small openings are integrated into window frames and enable controlled airflow between indoor and outdoor environments through adjustable covers or mechanisms.
Unlike larger screen ventilators, trickle vents are specifically designed for continuous background ventilation. They're typically installed at the top of window frames, taking advantage of natural convection patterns. Warm indoor air rises and exits through upper openings while fresh outdoor air replaces it from below.
The adjustment mechanism on most trickle vents is remarkably simple. A manual slider allows you to regulate airflow from fully open to completely closed. Need maximum fresh air during cooking? Slide it open. Experiencing a cold snap and want to minimize heat loss? Close it down. This flexibility makes them particularly valuable in bedrooms and living spaces where comfort preferences change throughout the day.
Several installation approaches exist for these screen ventilators:
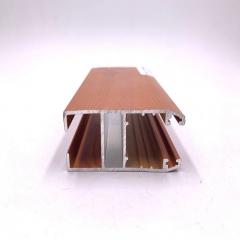
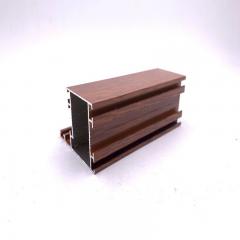
Modern trickle vents are available in uPVC, timber, and aluminum construction. Each material offers distinct advantages: uPVC for affordability and low maintenance, timber for heritage properties requiring aesthetic consistency, and aluminum for superior durability in demanding environments.
Here's where things get practical for DIY installers. Window screens expandable designs feature telescoping or adjustable frames that accommodate various window widths without custom manufacturing. Think of them as the adjustable wrench of the ventilation world: one unit fits multiple applications.
These ventilators typically offer adjustment ranges spanning 15 to 25 inches or more, with some models extending from 10 inches to 37 inches wide. The expansion mechanism usually involves overlapping frame sections that slide apart and lock at your desired width. This design flexibility means you can purchase a single product that works across multiple windows in your home, even when those windows have slightly different dimensions.
Securing the fit at various widths is straightforward. Most units include spring-loaded tension systems or screw-down clamps that create a snug, rattle-free installation. Quality expandable ventilators maintain their adjustment precision over years of use, while budget options may develop looseness that allows air leaks around the edges.
The following table compares these ventilator types to help you identify which style matches your specific requirements:
| Type | Best Application | Airflow Control Level | Weather Protection Rating |
|---|---|---|---|
| Louvered Screen Ventilators | Kitchens, bathrooms, humid climates | Moderate (fixed or limited adjustment) | Excellent (blocks rain, debris, insects) |
| Trickle Vents and Slot Ventilators | Bedrooms, living rooms, offices | High (fully adjustable slider) | Good (designed for continuous light ventilation) |
| Expandable Frame Ventilators | Multi-window installations, rentals, DIY projects | Varies by model (check specifications) | Moderate to Good (depends on seal quality) |
With these categories clearly defined, you're now equipped to evaluate products based on actual functionality rather than marketing claims. The next critical step involves ensuring whatever style you choose actually fits your windows properly, which requires accurate measurements and an understanding of size specifications.
Ever purchased something online only to discover it doesn't quite fit when it arrives? With an adjustable window ventilator, that frustration is entirely avoidable if you take accurate measurements upfront. The difference between a ventilator that seals perfectly and one that leaks air around every edge comes down to a few minutes of careful measuring.
Here's the reality: most sizing problems stem from measuring the wrong part of the window. Many homeowners measure their glass panes or exterior trim when what actually matters is the interior opening where your adjustable screen will sit. Let's walk through exactly how to get this right the first time.
Grab a tape measure, a pen, and a notepad. You'll want to record multiple measurements because window frames are rarely perfectly square, especially in older homes where settling and wear create slight variations. According to Window Hardware Direct, taking measurements at multiple points is essential for ensuring a proper fit.
Measuring Width:
Measuring Height:
Why use the smallest measurement? Because a window duct or ventilator sized to the largest dimension simply won't fit where the frame narrows. Using the smallest ensures your unit slides into place without forcing or binding.
Accounting for Frame Depth:
Frame depth matters more than many people realize. Measure from the outermost point of the window opening to the innermost point where your ventilator will rest. Most replacement ventilators require a minimum depth of approximately 3 1/4 inches. If your frame is shallower, you may need to explore surface-mounted options or consider a basement window ac kit designed for limited-depth installations.
One critical distinction: always measure the actual opening rather than the glass size. The glass sits within the frame, but your ventilator needs to fit the frame opening itself. Measuring glass dimensions will consistently give you smaller numbers than the usable opening space.
Here's where adjustable ventilators really shine. Unlike fixed-size units that demand exact measurements, expandable designs offer flexibility that accommodates minor variations and simplifies the selection process. Most adjustable screen products offer expansion ranges spanning 15 to 25 inches, with some models stretching from 10 inches to 37 inches wide.
The expansion mechanism typically works through overlapping frame sections that telescope apart. Imagine two rectangles, one slightly smaller than the other, sliding together and apart like a trombone. Spring-loaded tension systems or thumb-screw clamps lock the frame at your desired width once positioned in the window opening.
To ensure a secure fit at various widths:
Quality expandable vent kits include brush bristles or foam gaskets along the frame edges. These seals compress against the window track when you expand the unit to its proper width, creating a continuous barrier. Budget options with flimsy seals may work initially but develop leaks as materials compress permanently over time.
For specialized applications like installing a 3 inch window vent kit or adapting an ac window panel kit for ventilation purposes, always verify that the product's adjustment range encompasses your measured dimensions with room to spare on both ends. A unit that must expand to its absolute maximum to fit leaves no margin for sealing compression.
Getting the right physical fit is only half the equation. You also need adequate ventilation capacity for your space. A perfectly installed ventilator that's too small for the room won't solve your air quality problems.
Industry standards provide helpful guidance here. ASHRAE 62.2, the residential ventilation standard now required by ENERGY STAR and the Department of Energy for federally funded projects, establishes minimum ventilation rates for healthy indoor air.
Here's how to calculate whole-building ventilation requirements in practical terms:
For local ventilation in specific rooms, ASHRAE 62.2 specifies:
Most passive window ventilators provide between 5 and 30 CFM depending on size, wind conditions, and temperature differential. For rooms requiring higher ventilation rates, you may need multiple ventilators or powered solutions. However, for background ventilation throughout living spaces, a properly sized adjustable unit typically delivers adequate performance.
Before purchasing any ventilator, verify that its rated CFM capacity meets or exceeds your calculated requirements for the intended room.
Here's your complete pre-purchase measurement checklist:
Armed with these measurements and calculations, you're ready to confidently select a ventilator that fits your window precisely and delivers adequate airflow for your space. The next step involves actually installing your new unit, which brings its own set of considerations for ensuring proper seal and long-term performance.
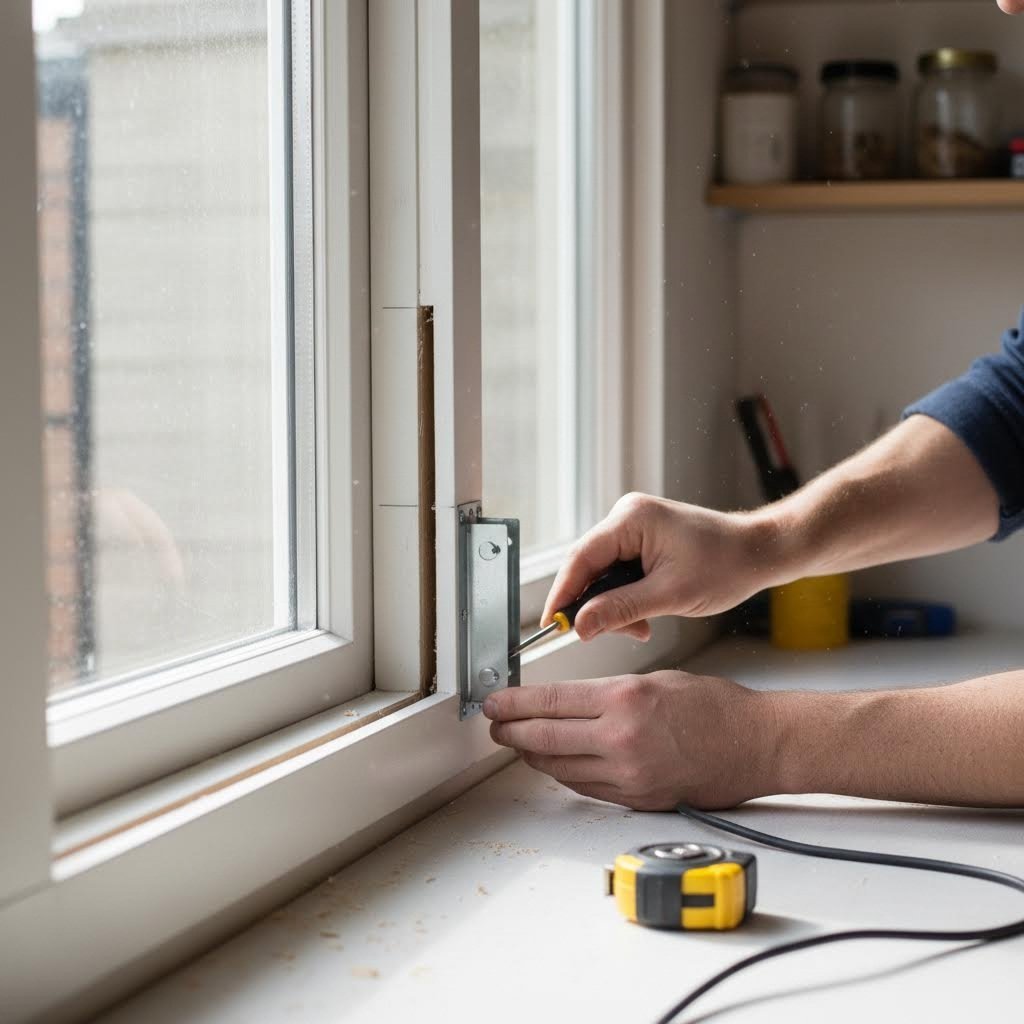
You've measured twice, selected the perfect adjustable window ventilator, and now the box sits waiting on your kitchen counter. What happens next determines whether you enjoy years of reliable airflow or deal with frustrating drafts and rattling frames. The good news? Installing a window vent kit is genuinely achievable for most DIY homeowners who take time to follow proper procedures.
Unlike complex ducting+kit installations that may require professional expertise, most adjustable ventilators are specifically designed for straightforward homeowner installation. With the right preparation and attention to detail, you'll have fresh air flowing through your space within an hour or two.
Before touching a single screw, spend time preparing both your window and your workspace. Rushing past this stage creates problems that haunt installations for years. According to HomeSecureShop, proper preparation is essential for a successful installation that prevents drafts and water ingress.
Cleaning the Window Frame:
Dirt, old paint, and debris interfere with proper sealing. Take these steps before starting:
Checking for Damage or Rot:
A window exhaust kit installed into a compromised frame creates bigger problems than it solves. Press firmly along wooden frames to detect soft spots indicating rot. For vinyl or aluminum frames, look for cracks, warping, or separated seams. If you discover significant damage, address repairs before proceeding with ventilator installation.
Gathering Necessary Tools:
Having everything within reach prevents frustrating mid-project supply runs. You'll typically need:
Test-Fitting Before Permanent Installation:
This step catches problems while they're still easy to fix. Position your duct window kit in the window opening without securing any fasteners. Expand adjustable units to their working width and check several critical points:
If everything checks out, you're ready to proceed. If not, now is the time to troubleshoot rather than after you've drilled holes or applied sealant.
With preparation complete, the actual installation follows a logical sequence. These steps apply to most adjustable window ventilators, though always consult your specific product's instructions for any unique requirements.
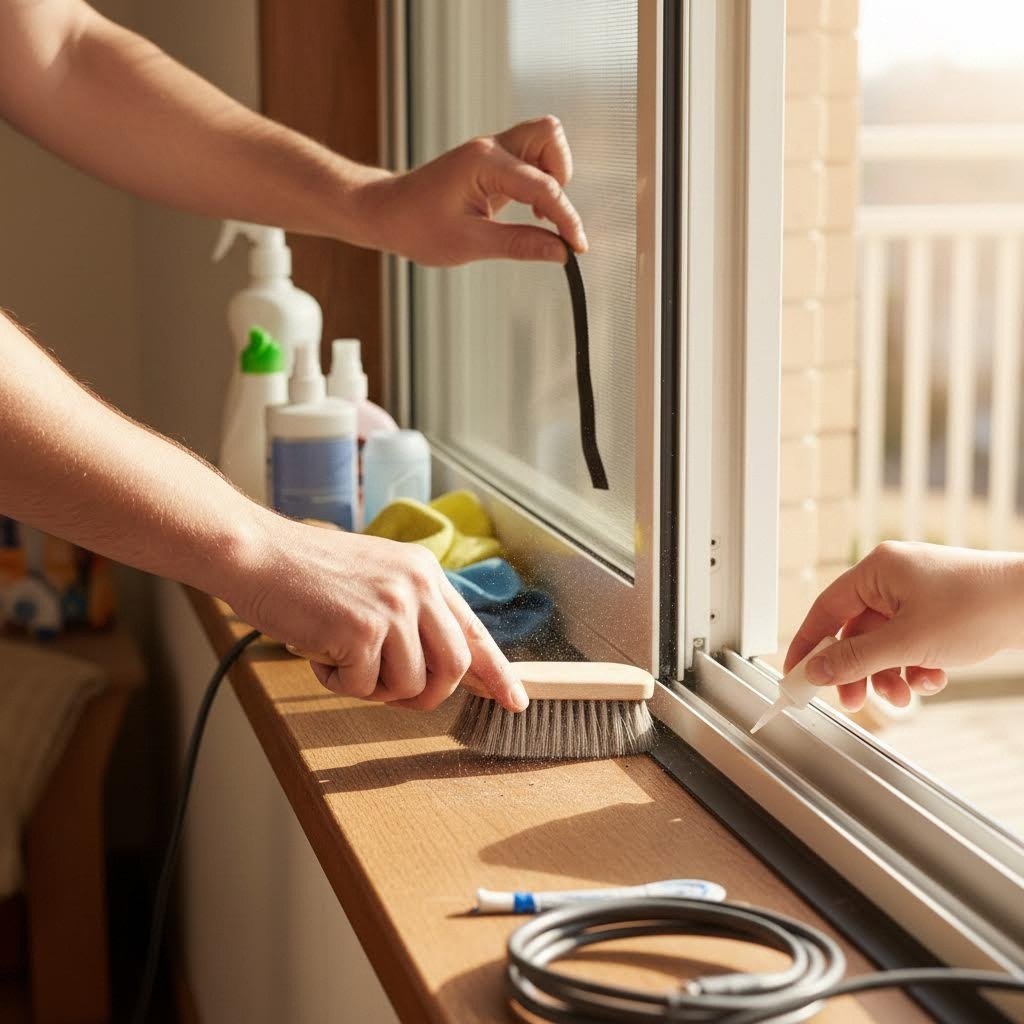
A ventilator that leaks around its edges defeats its entire purpose. Instead of controlled airflow, you get uncontrolled drafts. Instead of keeping insects out, you create new entry points. Sealing takes only minutes but makes the difference between professional results and frustrating problems.
Using Weatherstripping and Foam Tape:
Apply self-adhesive foam weatherstripping along any edges where the ventilator contacts the window frame. Eco Choice Windows & Doors emphasizes that using high-quality caulking and low-expansion spray foam around frames fills gaps effectively. For ventilator installations, focus on:
Foam tape compresses when the window closes, creating an airtight seal that blocks drafts and insects. Choose closed-cell foam for exterior applications since it resists moisture absorption better than open-cell alternatives.
Applying Weatherproof Silicone:
For permanent installations, silicone sealant adds another layer of protection. Apply a thin bead along exterior edges where the ventilator frame meets the window components. Smooth the bead with a wet finger or caulk tool, ensuring complete contact without gaps. Allow full cure time (typically 24 hours) before exposing the seal to rain.
Why Proper Sealing Matters:
Beyond comfort, sealing protects your investment. Poor seals allow:
Learning from others' errors saves time, money, and frustration. Industry experts note that rushing through installation is one of the most common mistakes, often leading to windows that aren't level or seals that haven't cured properly.
| Mistake | Consequence | Prevention |
|---|---|---|
| Incorrect measurements | Unit too tight, too loose, or gaps around edges | Measure three times at different points; use smallest dimension |
| Skipping the test fit | Problems discovered after holes drilled or sealant applied | Always position unit completely before securing any fasteners |
| Installing on damaged frames | Fasteners pull loose; rot spreads behind ventilator | Inspect and repair frame issues before installation |
| Overtightening screws | Warped frames, cracked plastic, stripped screw holes | Tighten until snug, then stop; do not use excessive force |
| Ignoring level during installation | Water pooling, operational binding, visible crookedness | Check level before securing; adjust as needed |
| Inadequate sealing | Drafts, insects, water intrusion, energy loss | Apply weatherstripping to all contact edges; use silicone on exterior joints |
When to Call a Professional:
Most adjustable window ventilator installations fall well within DIY capability. However, consider professional help if you encounter:
For comparison, exterior door vent kit installations often demand more expertise due to weatherproofing requirements and structural considerations. Window ventilators are generally simpler, but knowing your limits prevents costly mistakes.
With your adjustable window ventilator properly installed and sealed, you've completed the hands-on portion of this project. However, maximizing long-term performance depends on understanding how different materials affect durability and function, which directly influences how well your investment holds up over the years ahead.
You've installed your adjustable window ventilator correctly, sealed every edge, and verified the fit. But here's a question worth asking: what happens in five years? Ten years? The answer depends almost entirely on what materials went into building that ventilator in the first place.
Sounds complex? It doesn't have to be. Material choices directly affect how long your ventilator lasts, how well it performs in your specific climate, and how much maintenance you'll need to invest over time. Understanding these factors before you buy saves frustration and replacement costs down the road.
Think of it this way: a window ventilation exhaust fan might move air effectively on day one regardless of build quality. But the difference between a budget unit and a premium one becomes painfully obvious after a few seasons of sun exposure, temperature swings, and humidity. Let's break down exactly what to look for.
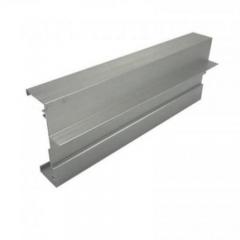
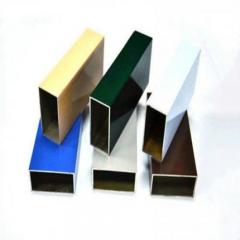
When evaluating frame materials for an adjustable window ventilator, you'll encounter three primary options: aluminum, steel, and plastic (typically PVC or ABS). Each brings distinct advantages and limitations that matter for long-term performance.
Aluminum Frames:
According to Window Gurus, aluminum offers exceptional durability with frames that can last 50+ years with minimal degradation. The material resists dents, shrugs off impacts, and maintains structural integrity through extreme temperature fluctuations. For ventilator applications, aluminum's lightweight strength proves particularly valuable since it supports larger openings without sagging or warping.
Corrosion resistance comes from aluminum's natural oxide layer, enhanced by powder coating or anodizing treatments. These finishes last decades without fading and resist the scratching and chipping that plague painted surfaces. In coastal or humid environments, properly finished aluminum outperforms steel significantly.
The primary drawback? Aluminum conducts heat at roughly 200 times the rate of plastic materials. Without thermal breaks, aluminum frames can create cold spots during winter and hot spots during summer. For ventilators specifically, this matters less than for windows since the opening already permits air exchange, but it's worth noting for applications where thermal efficiency ranks as a priority.
Steel Frames:
Steel delivers unmatched strength, making it the choice for security-focused applications or installations requiring maximum durability against physical impact. However, steel's weight creates installation challenges, and its susceptibility to rust demands ongoing maintenance in humid climates.
For most residential adjustable window ventilator applications, steel represents overkill. The additional strength rarely justifies the added weight, cost, and maintenance requirements. Commercial or industrial settings with specific security needs may warrant steel construction, but homeowners typically find aluminum provides adequate strength with far less hassle.
Plastic Frames:
PVC and similar plastic materials dominate the budget ventilator market for good reason. According to Window Gurus, vinyl (PVC) provides inherent insulation through multi-chamber designs, with R-values around 3.0 that outperform basic aluminum significantly. Manufacturing costs run lower, translating to consumer savings of 30-40% compared to aluminum alternatives.
Modern plastic formulations include UV stabilizers that prevent the yellowing and brittleness that plagued earlier generations. Quality plastic ventilators maintain their appearance and flexibility for 30-40 years under normal conditions. However, extreme heat remains problematic. Window Gurus notes that vinyl warps above 140°F, making it unsuitable for south-facing installations in hot climates or locations with intense direct sunlight.
The flexibility that makes plastic forgiving during installation becomes a liability in larger spans. Frames may bow or flex under wind pressure, compromising seals and allowing air leakage. For ventilators wider than 24 inches, aluminum typically delivers better long-term stability.
The mesh stretched across your ventilator does more than keep bugs out. Material choice affects visibility, airflow volume, durability, and even how much heat enters your space. Understanding these trade-offs helps you match screen material to your actual priorities.
Fiberglass Mesh:
According to Shade Screen Solutions, fiberglass mesh is one of the most cost-effective options available. Its flexibility makes installation straightforward, and the material won't rust or corrode regardless of climate conditions.
Standard fiberglass works well for general ventilation purposes and offers adequate insect protection for most situations. However, durability limitations exist. Fiberglass screens can tear under pressure from pets, children, or careless handling. Over time, the mesh may sag within the frame, affecting both appearance and functionality. For grey window screen applications where aesthetics matter, fiberglass may show wear earlier than premium alternatives.
Aluminum Mesh:
Aluminum screening provides superior strength and longevity compared to fiberglass. It resists sagging, maintains its shape across temperature changes, and handles physical contact without tearing. For households with pets, aluminum's durability often justifies the higher price point.
The trade-off involves visibility. Aluminum mesh is more visible than fiberglass, creating a slightly more obstructed view through the ventilator. The material also retains heat, becoming noticeably warm to the touch in sunny conditions. For exhaust vent duct applications where visibility matters less than durability, aluminum makes an excellent choice.
Specialty Mesh Options:
Beyond standard materials, specialty screens address specific needs:
Mesh Density Considerations:
Standard window screening uses an 18x16 mesh count, meaning 18 strands per inch horizontally and 16 strands vertically. This density blocks common insects while allowing excellent airflow. Tighter weaves improve pest protection but restrict air movement proportionally.
For adjustable ventilators where airflow optimization ranks as the primary goal, standard density usually provides the best balance. Reserve tighter mesh options for specific pest problems or locations where no-see-ums, gnats, or similar tiny insects create particular nuisances.
If you're working with systems like an ac infinity duct setup that requires maximum airflow, selecting mesh with appropriate density ensures your ventilator doesn't create an unexpected bottleneck in your overall ventilation plan.
The adjustment mechanism on your ventilator sees action every time you regulate airflow. A sticky slider or binding louver transforms a useful feature into a daily frustration. Quality mechanisms operate smoothly for decades, while cheap alternatives fail within months.
Why Smooth Operation Matters:
Consider how often you'll adjust your ventilator. Opening wider during cooking, closing partially during cold snaps, adjusting for seasonal changes, these interactions happen repeatedly throughout each year. A mechanism that requires excessive force or catches mid-travel discourages use. Eventually, occupants simply leave the ventilator in one position permanently, negating the advantage of adjustability entirely.
Quality slider controls use materials that resist binding even after years of exposure to dust, humidity, and temperature changes. Look for:
Louver Design Considerations:
According to Fenster Glazing, louvre vents consist of adjustable slats that can be angled to regulate the amount of light entering a space while also allowing for airflow. The quality of these slats and their pivot mechanisms directly affects daily usability.
Premium louvers feature individual pivot points with low-friction bushings. When you rotate the control rod, all slats move uniformly without binding or skipping. Budget designs use simpler linkages that wear unevenly, eventually causing some slats to stick while others move freely.
Weather resistance in louver mechanisms matters particularly for exterior-facing installations. Look for sealed pivot points that prevent water and debris from entering the mechanism. Open pivot designs invite corrosion and jamming after exposure to rain and humidity.
Vent Adapter Compatibility:
If your ventilation plans involve connecting additional components, like a vent adapter for specialized ducting, verify that adjustment mechanisms don't interfere with accessory mounting. Some slider designs block standard attachment points, limiting future expansion options.
The following table summarizes key differences to help you match materials to your specific situation:
| Material Type | Durability Rating | Maintenance Needs | Best Climate Applications |
|---|---|---|---|
| Aluminum Frame | Excellent (50+ years) | Low; occasional cleaning, annual seal inspection | All climates; especially coastal and humid regions |
| Steel Frame | Excellent (50+ years with maintenance) | Moderate; requires rust prevention in humid climates | Dry climates; security-focused applications |
| Plastic/PVC Frame | Good (30-40 years) | Minimal; wipe clean, check for warping | Moderate climates; avoid extreme heat exposure |
| Fiberglass Mesh | Moderate (10-15 years) | Low; replace when torn or sagging | All climates; budget-friendly general use |
| Aluminum Mesh | Good (20-25 years) | Low; resists sagging and tears | All climates; pet-friendly households |
| Pet-Resistant Mesh | Excellent (25+ years) | Low; withstands physical stress | All climates; homes with dogs or cats |
| Solar Mesh | Good (15-20 years) | Low; occasional cleaning for optimal performance | Hot climates; south and west-facing installations |
When evaluating products, remember that material quality often correlates with manufacturer confidence. Extended warranties suggest the company trusts their materials to perform. Short or limited warranties may indicate corners cut during production.
Understanding construction quality helps you evaluate products objectively rather than relying solely on price or marketing claims. However, even the best-built ventilator eventually needs attention. Knowing how to troubleshoot common issues and maintain your unit properly extends its useful life significantly, which brings us to practical care and problem-solving strategies.
You've invested time selecting, measuring, and installing your adjustable window ventilator. Everything worked perfectly at first. But now, months or years later, something feels off. Maybe there's a whistle when the wind picks up, or you notice condensation forming where it didn't before. Perhaps the slider mechanism that once glided smoothly now requires genuine effort to move.
Here's the reality: every window ventilator eventually needs attention. The difference between a unit that serves you for decades and one that frustrates you within a year often comes down to recognizing problems early and addressing them before they escalate. Let's walk through the most common issues and exactly how to fix them.
Air leaks around your window exhaust vent defeat its entire purpose. Instead of controlled ventilation, you get uncontrolled drafts that waste energy, let insects in, and create uncomfortable temperature variations near windows. The good news? Most leaks are straightforward to identify and fix.
How to Identify Air Leaks:
Start with a simple detection method. On a windy day, hold a lit incense stick or thin ribbon near the edges of your ventilator. Watch for smoke or ribbon movement that indicates air flowing through gaps. Pay particular attention to:
Another telltale sign? Condensation forming specifically around ventilator edges during cold weather. This indicates temperature differentials caused by air infiltration, essentially, cold outdoor air is sneaking past your seals and cooling the surrounding surfaces enough for moisture to condense.
Resealing Techniques:
Once you've located leaks, addressing them typically involves weatherstrip replacement or adding additional sealing material. According to Ecovent, proper sealing prevents the airflow bypass issues that compromise ventilation performance.
For self-adhesive foam weatherstripping:
For silicone caulk applications on exterior joints:
How Improper Fit Causes Drafts and Energy Loss:
Sometimes air leaks stem not from seal failure but from fundamental fit problems. If your ventilator was installed at its maximum expansion range with minimal compression, seals may not have engaged properly from the start. Similarly, settling in older homes can shift window frames enough to create gaps that didn't exist during installation.
In these cases, adding supplemental weatherstripping may provide a temporary fix, but the underlying issue may require repositioning the ventilator or selecting a unit better matched to your window dimensions. A window screen keeps rain out only when properly sealed; the same principle applies to air infiltration.
Wind whistling through your ventilator isn't just annoying, it's a symptom that something isn't quite right. Noise issues commonly affect louvered designs where air turbulence around the slats creates audible vibrations. Fortunately, several solutions exist that don't require replacement.
Understanding Wind Noise Sources:
Most ventilator noise falls into three categories:
Practical Solutions:
For whistling noises, the fix often involves adjusting louver angles or improving seals. If whistling occurs only at certain louver positions, experiment with fully open or fully closed settings to find a quieter configuration. Sometimes a slight angle adjustment eliminates the specific gap dimension that creates turbulence.
Adding dampening materials addresses rattling and vibration effectively. Consider these approaches:
For persistent humming, the structure itself may be resonating. Adding mass to the frame, even something as simple as applying a bead of silicone along interior edges, can change the resonant frequency enough to eliminate the sound.
If you're considering a heavy duty window fan as an alternative or supplement to your passive ventilator, keep in mind that powered solutions introduce their own noise considerations. Quality matters significantly when motor sound becomes a factor in your living environment.
Regular maintenance keeps your adjustable window ventilator functioning optimally for years. Neglected units develop problems that seem to appear suddenly but actually accumulated gradually. A simple seasonal schedule prevents most issues before they start.
Cleaning Mesh Screens:
Dust, pollen, and debris accumulate on screen mesh, progressively restricting airflow. According to ventilation maintenance experts, dusty supply valves and faster dust buildup often indicate it's time for cleaning.
For routine cleaning:
Lubricating Slider Mechanisms:
Slider controls and louver mechanisms need occasional lubrication to maintain smooth operation. Use silicone-based lubricants rather than petroleum products, which can attract dust and eventually gum up the mechanism. Apply sparingly to:
Inspecting Seals:
Weatherstripping and caulk degrade over time, especially when exposed to UV light and temperature extremes. During each seasonal inspection, check seals for:
Seasonal Maintenance Checklist:
This maintenance schedule applies whether you're managing a simple window fan exhaust or intake setup, venting window ac configurations, or standard passive ventilation. Consistent attention prevents small issues from becoming expensive problems.
Even well-maintained ventilators eventually reach the end of their useful life. Recognizing when repair no longer makes sense saves you from throwing money at a failing unit and suffering through diminished performance.
Signs That Indicate Replacement Is Needed:
Warped Frames:
Plastic frames exposed to excessive heat may develop permanent warping that prevents proper sealing. If your ventilator no longer sits flat against the window frame, or if gaps appear that can't be addressed with weatherstripping, the frame itself has failed. Aluminum frames rarely warp but can bend from impact damage.
Torn or Degraded Screens:
Small tears can sometimes be patched, but extensive damage or mesh that has become brittle and crumbles when touched requires replacement. UV degradation eventually affects all screen materials, causing the mesh to weaken and fail. If you're patching the same screen repeatedly, replacement provides better long-term value.
Non-Functional Adjustment Mechanisms:
When louvers no longer hold their position, when sliders bind so severely that lubrication doesn't help, or when control linkages have broken, the ventilator has lost its adjustability. A non-adjustable "adjustable" ventilator offers no advantage over a fixed vent and should be replaced with a functioning unit.
Corrosion and Structural Damage:
Rust that has eaten through metal components, plastic that has cracked from stress or age, or joints that have separated beyond repair all indicate a ventilator past its service life. Safety concerns also arise when structural integrity is compromised, a failing ventilator could fall during high winds or create security vulnerabilities.
Making the Replacement Decision:
Consider replacement when repair costs approach 50% of new unit pricing, when multiple components have failed simultaneously, or when the existing ventilator no longer meets your ventilation needs. Technology improvements mean newer units often outperform older models in airflow control, weather resistance, and energy efficiency.
Before purchasing a replacement, revisit your measurements since window dimensions may have changed slightly from settling or previous repairs. Use the sizing guidance from earlier sections to ensure your new ventilator fits as perfectly as your original installation should have.
With proper troubleshooting skills and a consistent maintenance routine, your adjustable window ventilator will deliver years of reliable service. However, performance also depends on compatibility with your specific window type and existing systems, factors that deserve careful consideration when evaluating your overall ventilation strategy.
You've selected the right ventilator type, measured your windows precisely, and even mastered the installation process. But here's a question that trips up many homeowners: will this adjustable window ventilator actually work with your specific windows and existing systems? The answer isn't always straightforward.
Imagine purchasing a quality ventilator only to discover it won't fit your casement windows properly, or that it interferes with your HVAC system's airflow balance. These compatibility issues are entirely avoidable when you understand how different window configurations and building systems interact with passive ventilation solutions.
Let's break down the key factors that determine whether a particular ventilator will integrate seamlessly into your home or create unexpected headaches.
Not every adjustable window ventilator works with every window style. The way your windows open, close, and seal directly affects which ventilator designs will function properly. Understanding these relationships helps you avoid purchasing products that simply won't work in your situation.
Double-Hung Windows:
These classic windows feature two sashes that slide vertically within the frame. According to The London Sash Window Company, double-hung windows offer versatile opening options since homeowners can open the top, bottom, or both sashes for controlled ventilation. This flexibility makes them highly compatible with most adjustable ventilator styles.
Expandable screen ventilators work particularly well with double-hung configurations. The ventilator sits in the lower opening while the upper sash remains operational, or vice versa. You can even use a window fan for horizontal window airflow patterns by positioning ventilators strategically. For trickle vents, installation typically occurs at the frame head above both sashes, providing continuous background ventilation without affecting normal window operation.
Casement Windows:
Casement windows swing outward like doors, hinged on one side and operated by cranks or levers. This design creates excellent ventilation potential but presents unique compatibility challenges. As noted by The London Sash Window Company, casement windows require adequate space outside to swing open, which can be a limitation in tight areas.
Standard expandable ventilators don't work well with casement designs because the outward swing conflicts with anything mounted in the opening. Instead, consider:
One notable limitation: The London Sash Window Company points out that casement windows are less suitable for window air conditioning units due to their outward swing. If you're considering ducting a window air conditioner alongside passive ventilation, casement windows require creative solutions or alternative mounting approaches.
Sliding Windows:
Horizontal sliding windows move side-to-side on tracks, creating an opening on either the left or right side. A window fan sliding window setup works well because ventilators can occupy the non-opening portion of the window frame without restricting the sliding sash.
Key considerations for sliding windows include:
Horizontal and Awning Windows:
Horizontal windows that tilt outward from the bottom (awning style) or inward from the top present similar challenges to casement configurations. The swing arc must remain clear, limiting options to frame-mounted or external ventilator solutions.
For these window types, louvered ventilators mounted permanently in a portion of the frame often work better than adjustable expanding units. The trade-off is less flexibility, but the installation remains functional regardless of window position.
Your adjustable window ventilator doesn't operate in isolation. It becomes part of your building's overall air management strategy, working alongside heating, cooling, and mechanical ventilation systems. Understanding these interactions helps you maximize benefits while avoiding potential conflicts.
How Passive Ventilation Complements HVAC Systems:
According to sustainable building research, natural ventilation harnesses the power of natural forces—wind and buoyancy—to create comfortable indoor environments. When properly integrated, passive ventilation through adjustable window ventilators reduces the workload on mechanical systems significantly.
The benefits of this integration include:
Balancing Passive and Mechanical Ventilation:
For optimal performance, coordinate your window ventilator operation with your HVAC schedule. During mild weather when heating and cooling systems are idle, open ventilators fully to maximize free air exchange. When HVAC systems are actively conditioning air, partially close ventilators to prevent wasted energy while maintaining minimum fresh air requirements.
If your building uses a window ac duct setup or ducted window ac system, consider how additional ventilation affects pressure balance. Introducing fresh air through window ventilators while the AC runs can slightly reduce cooling efficiency but improves overall air quality. The trade-off is usually worthwhile in spaces where air quality concerns outweigh minor energy considerations.
Cross Ventilation Strategies:
Building design research emphasizes that positioning openings to maximize prevailing winds and creating cross ventilation enhances airflow throughout buildings. If you're installing multiple ventilators, consider placing them on opposite walls to create natural air pathways. Warm air entering through ventilators on the sunny side can exit through ventilators on the shaded side, creating continuous circulation without any mechanical assistance.
This approach works particularly well in moderate climates where outdoor temperatures remain comfortable for extended periods. In extreme heat or cold, the same cross-ventilation pathways can be closed to maintain conditioned air within the building envelope.
Building codes exist to ensure safe, healthy, and efficient structures. Your ventilation choices affect compliance with these standards, particularly in regions with strict energy requirements. Understanding relevant codes helps you make informed decisions and avoid costly corrections later.
ASHRAE 62.2 Residential Ventilation Standards:
The American Society of Heating, Refrigerating and Air-Conditioning Engineers establishes ventilation guidelines adopted throughout North America. According to Energy Code Works, California has adopted the residential standards of ASHRAE 62.2, requiring whole-house ventilation systems that provide calculated minimum outdoor air volumes.
The standard specifies minimum ventilation rates based on floor area and occupancy. For example, the calculation requires a minimum of 1 CFM for each 100 square feet of floor area plus 7.5 CFM for each occupant. A 3-bedroom, 1,800 square foot home would require 48 CFM of continuous ventilation to meet this standard.
Passive window ventilators can contribute to meeting these requirements, though they typically supplement rather than replace mechanical ventilation in jurisdictions that mandate specific airflow rates. The variable nature of wind-driven ventilation means passive systems can't guarantee consistent CFM delivery the way powered fans can.
Title 24 Energy Standards:
California's Title 24 Building Energy Efficiency Standards represent some of the nation's most stringent energy requirements. These standards require whole-house ventilation systems that provide calculated minimum outdoor air using either continuously running bathroom fans or supply/return air ventilation through central HVAC systems.
While passive ventilators alone may not satisfy Title 24's continuous ventilation requirements, they can reduce the operational burden on mechanical systems and improve overall air quality beyond code minimums. In retrofit situations where adding mechanical ventilation proves impractical, well-designed passive ventilation may be accepted as an alternative approach when properly documented.
ENERGY STAR Considerations:
ENERGY STAR certification for homes includes ventilation requirements aligned with ASHRAE standards. Homes seeking this certification must demonstrate adequate ventilation capacity, which increasingly includes verification of both mechanical systems and passive strategies working together.
Adjustable window ventilators support ENERGY STAR goals by providing controlled fresh air intake without the energy penalty of powered systems. When ducting a window air conditioner or integrating other mechanical equipment, passive ventilation helps maintain air quality without adding to electrical consumption.
Before installing any ventilation system, verify your local building code requirements with your municipality's building department. Requirements vary significantly by jurisdiction, and some areas mandate professional installation or inspection for ventilation modifications.
Key Compliance Considerations:
When evaluating your ventilation strategy against building codes, consider these factors:
The interaction between passive window ventilators and building codes continues evolving as energy efficiency standards advance and indoor air quality receives greater attention. Staying informed about requirements in your jurisdiction ensures your ventilation investments remain compliant and add lasting value to your property.
With compatibility and compliance factors clearly understood, the final step involves selecting the specific ventilator that best matches your priorities. The next section provides practical guidance for making that final decision with confidence.
You've explored the types, mastered the measurements, understood installation techniques, and evaluated material options. Now comes the moment of truth: which adjustable window ventilator actually deserves your money? With so many products competing for attention, making a confident decision requires clarity about what you're trying to accomplish and which features deliver genuine value.
Think about it this way. A portable air conditioning vent kit solves a different problem than a trickle vent designed for continuous background ventilation. An air conditioner window vent kit addresses cooling equipment needs, while a passive ventilator focuses on fresh air exchange. Understanding your primary goal eliminates options that don't fit and highlights the features that actually matter for your situation.
Let's walk through a practical framework for making this decision without second-guessing yourself.
Before comparing products, take a moment to identify what problem you're actually solving. Most homeowners fall into one of three categories, and each demands different ventilator characteristics.
Condensation Control:
If moisture buildup on windows, walls, or frames drives your ventilation decision, you need consistent background airflow that operates continuously, even when you're asleep or away from home. According to Window Advice Centre, condensation occurs when warm, moisture-laden air meets a cooler surface, causing water vapor to turn into liquid droplets. In damp climates or well-insulated homes, this challenge intensifies.
For condensation control, prioritize:
The key insight here? Condensation control demands reliable, continuous performance rather than maximum airflow capacity. A ventilator that stays partially open all day outperforms a larger unit that occupants close because it creates uncomfortable drafts.
Fresh Air Circulation:
Maybe stuffiness bothers you more than moisture. Rooms feel heavy, odors linger after cooking, and you simply want the sensation of fresh air without opening windows fully. This goal emphasizes airflow volume and user control over continuous operation.
According to indoor air quality research, indoor air can contain a surprising mix of pollutants including dust, volatile organic compounds from cleaning products, and moisture from daily activities. Without proper exchange, these accumulate to levels that affect comfort and health.
For fresh air circulation, look for:
If you're supplementing with powered solutions, a window vent for portable air conditioner applications may serve dual purposes, allowing equipment exhaust while also admitting fresh air when the AC isn't running.
Temperature Regulation:
In moderate climates, strategic ventilation can reduce cooling costs by bringing in cool night air or allowing heat to escape during warm afternoons. This goal emphasizes maximum airflow potential along with the ability to seal completely when outdoor temperatures become unfavorable.
Temperature regulation priorities include:
For comparison, products like the vivosun window vent kit focus primarily on equipment exhaust rather than temperature management, making them less suitable for this goal despite similar appearances.
Once you've identified your primary goal, the next challenge involves distinguishing genuinely well-made ventilators from products that merely look similar in photographs. Quality differences become obvious over time, but recognizing them before purchase saves frustration and replacement costs.
Build Quality Essentials:
Premium ventilators reveal their quality through details that budget options skip. When evaluating products, examine:
According to Window Advice Centre, modern glazing technology increasingly incorporates features like warm edge spacer bars that minimize thermal bridging. Quality ventilators apply similar engineering principles, ensuring that the ventilation opening doesn't become a weak point in your window's thermal performance.
Adjustment Precision:
The adjustment mechanism separates daily-use products from frustration sources. Test or research how smoothly controls operate:
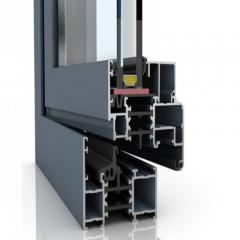
For uPVC window systems specifically, Shengxin Aluminium's Slim uPVC Window Trickle Vents exemplify quality engineering with their low-profile design that integrates seamlessly without disrupting window aesthetics. The manual slider enables precise airflow control, allowing occupants to dial in exactly the ventilation level they need. This seamless integration maintains the thermal efficiency that modern uPVC windows provide while still delivering the continuous fresh air circulation that prevents condensation and stuffiness.
Durability Markers:
Long-term performance depends on materials and construction that withstand years of use and environmental exposure:
Products meeting international standards like EN 13141-1 for ventilation components and manufactured under ISO 9001:2015 quality management systems provide additional assurance of consistent construction quality.
Price matters, but the cheapest option rarely delivers the best value. Understanding the relationship between upfront cost and long-term performance helps you make decisions you won't regret in three years.
The True Cost Equation:
Consider what you're actually paying for over the ventilator's entire service life:
According to ventilation industry research, durable, well-engineered ventilators provide substantially better return on investment than budget alternatives that require frequent attention or early replacement. The math often favors spending more initially when you calculate total ownership costs.
Where Premium Features Matter:
Not every premium feature delivers proportional value. Focus your budget on aspects that directly affect your primary goal:
| Goal | Worth Paying More For | Less Critical |
|---|---|---|
| Condensation Control | Continuous airflow reliability, humidity response, seal quality | Maximum CFM capacity, decorative finishes |
| Fresh Air Circulation | Smooth adjustment controls, higher CFM ratings, mesh quality | Automated features, complex installation options |
| Temperature Regulation | Complete sealing capability, large opening capacity, durability | Partial-open precision, integrated sensors |
Key Features to Prioritize When Comparing Options:
When evaluating any adjustable window ventilator against alternatives, use this checklist to ensure you're comparing what actually matters:
Whether you're evaluating an ac vent kit for equipment support or a dedicated passive ventilator for air quality improvement, these criteria apply consistently. The right choice balances your specific goals, your budget constraints, and the realistic expectations of how long you want this solution to last.
Remember that window vent kit for air conditioner applications and pure ventilation products serve different purposes despite surface similarities. An air conditioner vent kit prioritizes equipment exhaust over controlled fresh air intake, making direct comparisons misleading. Match your purchase to your actual need rather than selecting based on price alone.
Armed with clear goals, quality indicators, and a realistic value assessment, you're now equipped to select an adjustable window ventilator with confidence. The investment you make today in proper sizing, quality construction, and appropriate features pays dividends in comfort, air quality, and energy efficiency for years to come.
Yes, window exhaust fans and ventilators work effectively for cooling and air quality improvement. The key is strategic placement—exhaust hot air from the warmest side of your home while drawing cooler air through another opening. Passive adjustable window ventilators work continuously without electricity, using natural pressure differences to exchange stale indoor air for fresh outdoor air. For optimal results, position ventilators to create cross-ventilation pathways, and adjust opening levels based on outdoor conditions.
Window ventilator prices vary widely based on type and quality. Basic expandable screen ventilators start around $10-15 at home improvement stores, while premium aluminum louvered models range from $25-50. Trickle vents designed for uPVC windows typically cost $15-40 per unit. Quality engineering matters—products like Shengxin Aluminium's Slim uPVC Window Trickle Vents offer durable, low-profile designs with precise airflow control that justify slightly higher investment through longer service life and better thermal efficiency.
Absolutely. Several installation options exist for adding ventilation to windows. Trickle vents can be fitted into the top of window frames or integrated into the opening sash above the glazing unit. Expandable screen ventilators sit in the window opening when the sash is raised. Over-frame vents mount above the window without modifying the frame itself. The best approach depends on your window type—double-hung windows offer the most flexibility, while casement windows require frame-mounted or over-frame solutions.
Ventilation windows and adjustable ventilators effectively improve indoor air quality when properly sized and installed. They reduce indoor pollutant concentrations including carbon dioxide, volatile organic compounds, and allergens by providing continuous fresh air exchange. Benefits include condensation reduction, odor elimination, humidity control, and temperature regulation. The EPA notes Americans spend 90% of their time indoors where pollutant levels can be 2-5 times higher than outdoors—making proper ventilation essential for health and comfort.
Start by measuring your window opening width at three points (top, middle, bottom) and use the smallest measurement. Measure height similarly on left, center, and right sides. Check frame depth to ensure adequate clearance. For ventilation capacity, calculate room requirements using ASHRAE 62.2 standards: multiply occupants by 7.5 CFM, add 1% of square footage, and ensure your ventilator meets or exceeds this total. Most passive ventilators provide 5-30 CFM depending on size and conditions.


 خدمة الإنترنت
 0086 136 3563 2360
 sales@sxalu.com
 +86 136 3563 2360
 العربية
 English
 français
 Deutsch
 русский
 español
 português
 ไทย
ไทย Việt
Việt Українська