House window vents are fixed or adjustable openings built into or added to window frames that allow controlled airflow without fully opening the window. They provide continuous, low-level window ventilation even when your windows are closed and locked.
Ever noticed a small slot or ventilation panel at the top of a window frame? That's a window vent in action. These openings come in various forms, from simple trickle vents integrated into the frame to more elaborate adjustable inserts. Their job is straightforward: let fresh air in and stale air out, quietly and continuously.
Unlike opening a window wide, which can invite drafts, noise, and security concerns, a window vent delivers a measured trickle of airflow. You get the benefits of air exchange without the downsides of leaving windows ajar. This makes them especially useful in bedrooms at night, in rooms facing busy streets, or anywhere you want ventilation without compromise.
Modern homes are built tight. Energy-efficient windows, improved insulation, and sealed building envelopes all help reduce heating and cooling costs. But there's a trade-off: these airtight spaces can trap pollutants inside.
Think about what accumulates in a closed room. Human metabolism alone can push indoor CO2 levels above 3,000 ppm in poorly ventilated spaces. Add moisture from cooking and showering, volatile organic compounds (VOCs) off-gassing from furniture and cleaning products, and you've got a recipe for stuffy, unhealthy air.
Poor ventilation doesn't just feel uncomfortable. It can encourage mold growth, trigger allergies, and even affect concentration and productivity. Research from Lawrence Berkeley National Laboratory highlights that many poorly ventilated homes develop mold and mildew in wall cavities, along with elevated levels of airborne chemicals.
A well-ventilated home isn't just more comfortable — it's structurally healthier, reducing the risk of mold, condensation damage, and poor air quality.
Window ventilation offers a simple, passive solution. By maintaining a steady air exchange rate, these vents help dilute indoor pollutants, control humidity, and keep your living spaces fresh. They work around the clock without electricity, noise, or ongoing maintenance costs. For naturally ventilated homes, they're often the first line of defense against the invisible buildup of stale, contaminated air.
Not all window vents work the same way. Some are dedicated ventilation inserts designed purely for airflow. Others are window styles that double as vents when opened. Understanding the difference helps you pick the right solution for your home.
Trickle vents are small slots fitted into window frames, usually at the top of the sash or frame head. They allow continuous low-level airflow even when the window is fully closed and locked. You'll find them on many modern uPVC and timber windows, often as a building code requirement in new construction. Their design is simple: a narrow opening with an adjustable flap or slider that lets you control how much air passes through.
Passive insert vents work differently. These are retrofit units inserted into existing glazing or frames, typically by drilling a hole through the glass or cutting into the frame. They're a practical option when you want to add ventilation to older windows without replacing the entire unit. Think of them as a window ventilation kit you can install after the fact.
Both types share a common goal: maintaining a steady, low-volume air exchange without requiring you to open the window. This makes them ideal for security-conscious homeowners, bedrooms facing noisy streets, or any room where you want fresh air without drafts.
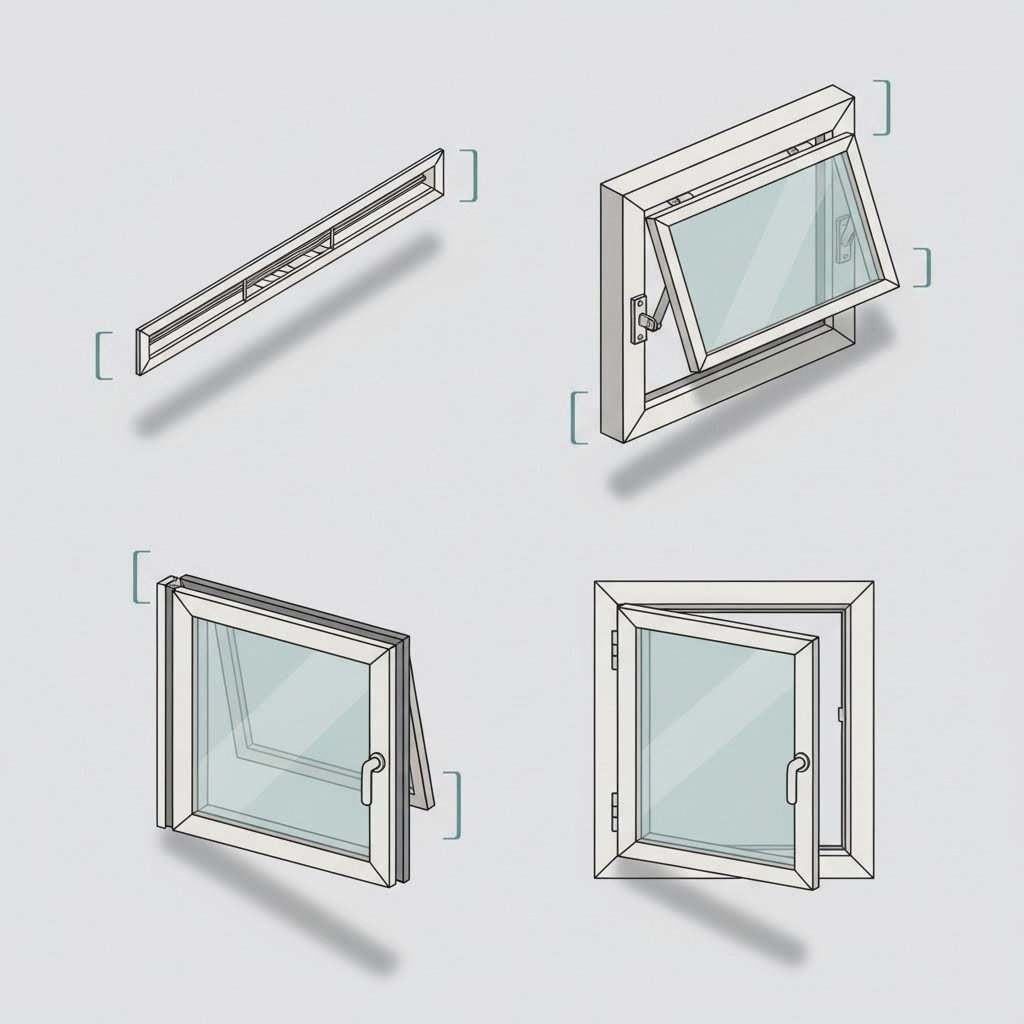
Beyond dedicated ventilation inserts, several window styles function as vent windows when opened. These are full window types that provide ventilation as part of their design.
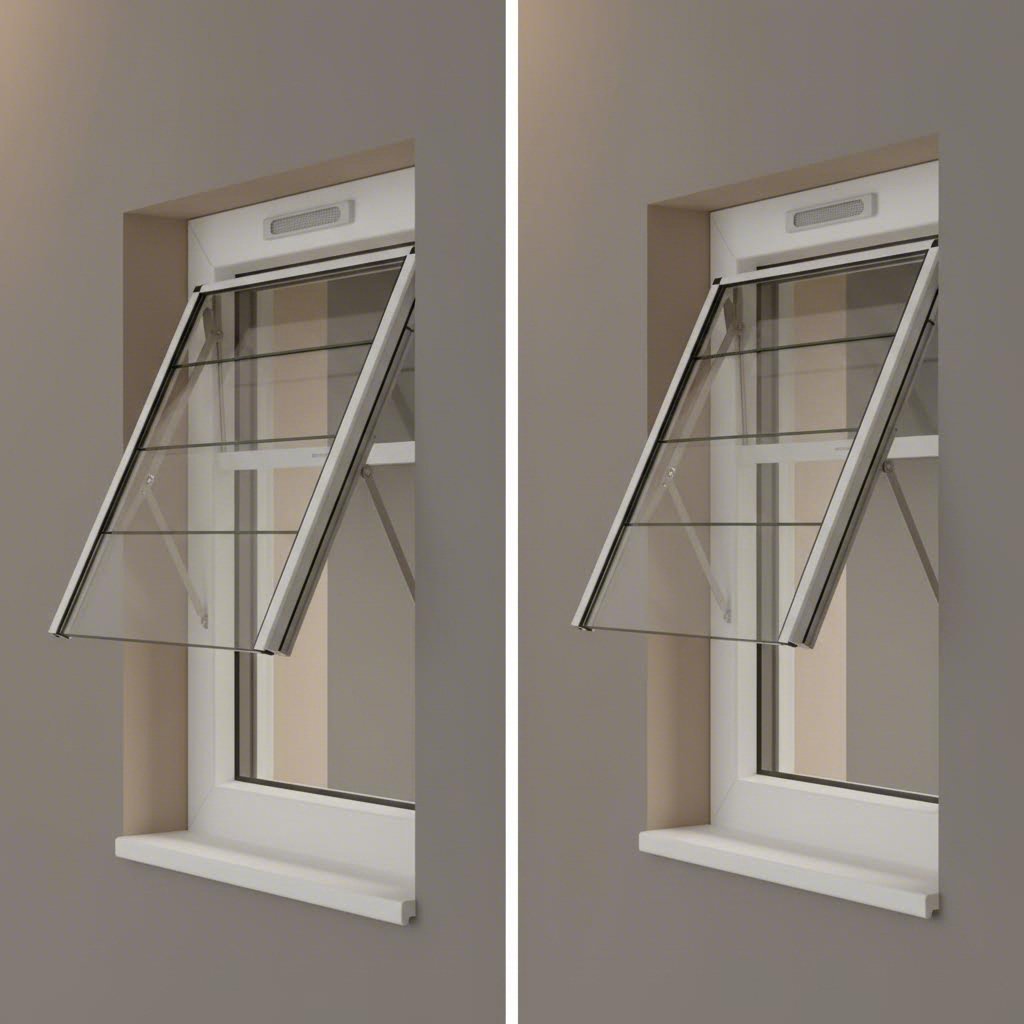
Imagine you're looking at a basement window that tilts inward from the top. That's a hopper window. Or picture a bathroom window that swings outward from the bottom, creating a small awning that keeps rain out while letting air in. Each style has its own mechanics and best-use scenarios.
Here's a quick breakdown of the main types:
The key distinction? Trickle vents and passive inserts are dedicated ventilation components. They exist solely to move air. Hopper, awning, casement, and jalousie types are full window styles that happen to provide ventilation when opened. A ventilator window in this sense is any operable window designed with airflow as a primary function.
Wing windows deserve a quick mention. These small hinged panels, sometimes called vent windows, were once common on car doors and older homes. They pivot open to direct airflow into a space. While less common in modern residential construction, you'll still see them on vintage vehicles and period properties.
Knowing which category your needs fall into, dedicated insert or operable window style, narrows your options considerably. From there, matching the right vent type to your specific problem becomes much simpler.
So you know the vent types. But which one actually solves your problem? Different ventilation issues call for different solutions. A basement struggling with musty air needs a different approach than a bedroom battling morning condensation. Let's map common home ventilation problems to the vent types that fix them.
Wake up to foggy windows every winter morning? That's condensation, and it happens when warm, moist indoor air meets cold glass surfaces. The moisture in the air releases as tiny water droplets, streaming down your windows and pooling on sills. Left unchecked, this leads to mold growth, peeling paint, and even wood rot around frames.
The fix isn't complicated. You need to keep air moving, even when windows stay closed. Trickle vents and passive insert vents excel here because they maintain a low but continuous air exchange rate. This steady airflow prevents moisture from settling on cold surfaces by equalizing indoor and outdoor humidity levels.
Think of it this way: stagnant air holds moisture like a sponge. Moving air releases it. Trickle vents provide constant, controlled airflow without compromising insulation or security. They're particularly effective in bedrooms, where overnight breathing adds significant moisture to enclosed spaces.
For homes with existing windows, passive insert vents offer a retrofit solution. These units fit into drilled glazing or cut frame sections, adding ventilation capacity to windows that weren't originally designed with airflow in mind. The key principle remains the same: keep air circulating to prevent moisture from condensing on cold surfaces.
Condensation isn't the only enemy. Kitchens and bathrooms generate the highest humidity and VOC loads in a typical home. Steam from cooking, showering, and washing releases moisture that spreads throughout your living space. Cleaning products, paints, and building materials off-gas volatile organic compounds that accumulate in poorly ventilated rooms.
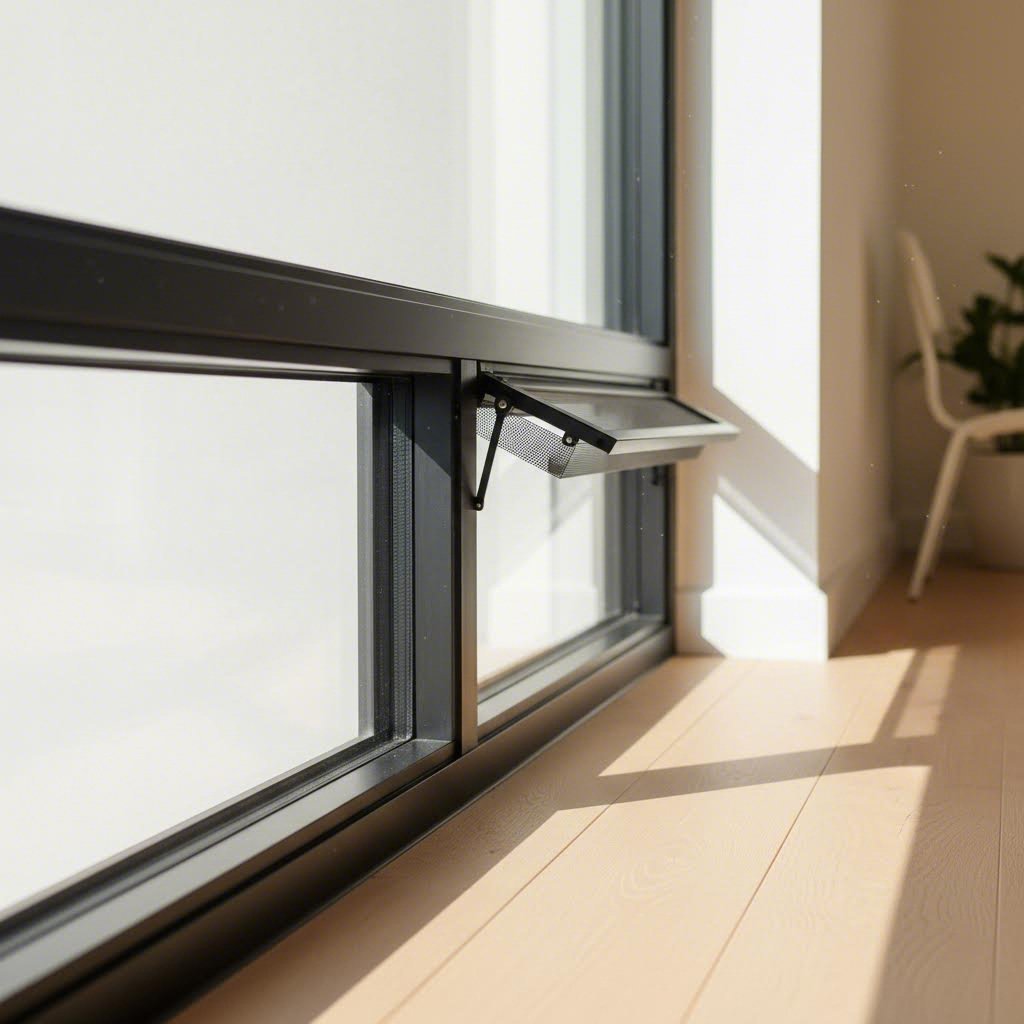
A bathroom window vent addresses these localized air quality issues directly at the source. Awning windows work particularly well in bathrooms because they can remain open during rain, positioned higher on walls for privacy while still providing airflow. Hopper windows offer similar benefits in tighter spaces.
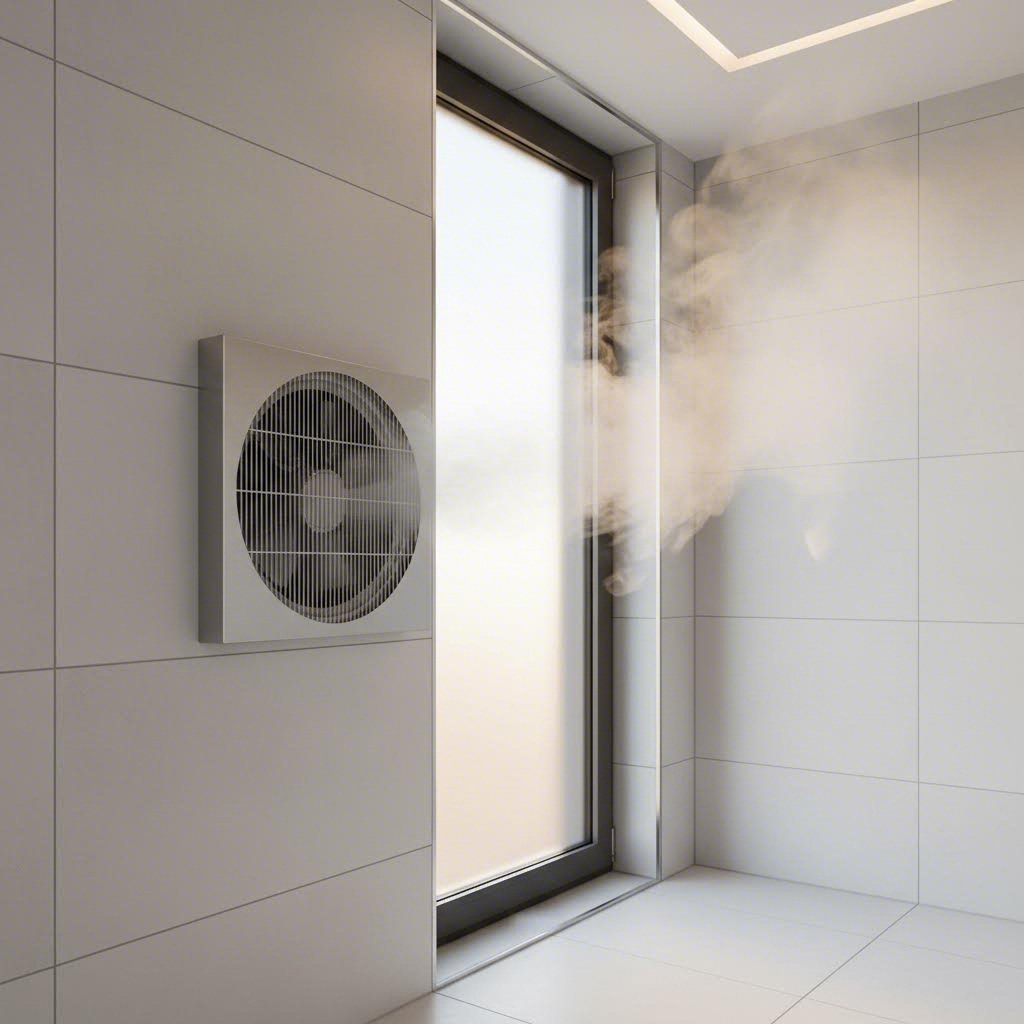
For more aggressive moisture removal, a bathroom ventilation fan window setup combines passive venting with active extraction. A window exhaust vent pulls humid air directly outside rather than letting it drift through your home. This is especially valuable in bathrooms without exterior walls or where passive venting alone can't keep up with heavy use.
Basements present their own challenges. Below-grade spaces are naturally prone to high humidity, limited natural ventilation, and potential groundwater infiltration. A basement window vent helps control moisture levels by promoting air circulation and preventing stagnant air from accumulating. Proper basement window ventilation is essential for preventing mold growth, musty odors, and structural damage from excess moisture.
Hopper windows are a common choice for basement ventilation because they open inward from the top, fitting well in spaces where exterior clearance is limited. They provide good airflow while maintaining security. For basements with persistent humidity issues, combining a hopper vent with a dehumidifier or mechanical exhaust system often delivers the best results.
| Problem | Best Vent Type |
|---|---|
| Chronic window condensation | Trickle vents or passive insert vents for continuous low-level air exchange |
| Stale, stuffy air in living spaces | Trickle vents combined with periodic window opening for cross-ventilation |
| High humidity in bathrooms | Awning or hopper window vents, or a window exhaust vent for active extraction |
| VOC buildup from cleaning products or off-gassing | Casement windows for high-volume purge ventilation, trickle vents for background dilution |
| Basement moisture and musty odors | Hopper windows or basement window vents paired with dehumidification if needed |
| Kitchen steam and cooking odors | Casement or awning windows above countertops, or a dedicated window exhaust vent |
The general principle? Match the ventilation rate to the moisture or pollutant load. Low-level background issues like bedroom condensation respond well to passive trickle vents. High-humidity zones like bathrooms and kitchens often need operable windows or active exhaust systems. Basements typically require a combination approach, addressing both air exchange and moisture control.
Once you've identified your problem and matched it to a vent type, the next step is comparing your options across practical factors like cost, installation complexity, and energy impact.
You've matched your ventilation problem to a vent type. Now comes the practical question: which option fits your budget, skill level, and energy goals? Comparing vented windows across key decision factors helps you narrow down the best choice for your situation.
When evaluating a window ventilation system, five factors matter most: how much air it moves, how hard it is to install, what it costs, where it works best, and how it affects your energy bills. The table below breaks down each major vent type across these criteria.
| Vent Type | Ventilation Rate | Installation Complexity | Approximate Cost Range | Best Use Case | Energy Impact |
|---|---|---|---|---|---|
| Trickle Vents | Low | DIY-friendly | Budget | Bedrooms, living rooms, continuous background ventilation | Minimal heat loss when properly sized |
| Passive Insert Vents | Low to Medium | DIY-friendly to moderate | Budget to mid-range | Retrofitting older windows, adding ventilation without replacement | Low impact with adjustable airflow control |
| Hopper Windows | Medium | Professional recommended | Mid-range | Basements, bathrooms, laundry rooms, tight spaces | Moderate; weatherstripping less efficient than compression seals |
| Awning Windows | Medium to High | Professional recommended | Mid-range to premium | Kitchens, bathrooms, rainy climates | Low impact; compression seal provides excellent efficiency |
| Casement Windows | High | Professional required | Mid-range to premium | Living areas, bedrooms, anywhere maximum airflow is needed | Low impact; superior draft blocking when closed |
| Jalousie Vents | High | Professional required | Mid-range | Porches, sunrooms, mild climates | High heat loss; poor weather sealing between slats |
A few things stand out. Trickle vents sit at the top for a reason: they're the most accessible option for homeowners who want continuous ventilation without major installation work or energy penalties. Windows with vents built into the frame require no structural changes and maintain your home's insulation integrity.
Venting windows like hoppers and awnings offer more airflow but require professional installation in most cases. Hopper and awning windows are priced similarly, with double-pane, medium-sized units typically ranging from $1,168 to $1,708. The final cost depends on size, frame material, glass type, and installation complexity.
Small vent windows like hoppers work well in tight spaces where larger operable windows won't fit. If you're considering a double vent window configuration, pairing a fixed picture window with an adjacent hopper or awning provides both views and ventilation without sacrificing wall space.
Numbers only tell part of the story. Here's an honest breakdown of what each ventilation window type does well and where it falls short.
What about jalousie vents? They deserve a mention for completeness. These louvered windows with horizontal glass slats offer excellent airflow control and a distinctive mid-century aesthetic. However, they're a poor choice for climate-controlled spaces. The gaps between slats make them nearly impossible to seal properly, resulting in significant heat loss in winter and air conditioning loss in summer. Reserve them for porches, sunrooms, or mild climates where energy efficiency isn't a priority.
The right choice depends on your specific situation. For most homeowners looking to improve indoor air quality without major renovation, trickle vents or passive inserts offer the best balance of cost, ease, and effectiveness. If you're replacing windows anyway or need higher ventilation rates, hopper and awning styles provide more airflow with reasonable energy performance.
But what if you already have windows and want to add ventilation without replacing them? The next section covers retrofit options for existing homes versus planning ventilation into new construction.
Already have windows installed and wondering if you can add ventilation without ripping them out? Good news: retrofitting is almost always possible. The real question is which method works for your specific windows and how much work you're willing to take on.
Most homeowners fall into this category. You've got perfectly functional windows, but they lack ventilation. Maybe condensation has become a problem, or you're noticing stale air in certain rooms. The solution doesn't require full vent window replacement. Instead, you can add ventilation capacity to what's already there.
There are two proven approaches for retrofitting trickle vents, and nearly all windows can accommodate one of them.
The first method uses slimline frame-fitted vents. Modern retrofit designs require as little as 18 mm of frame height, making them viable even in situations where older, bulkier vents wouldn't fit. This approach involves cutting a narrow slot in the head of the window frame, installing a slim internal vent, and fitting a low-profile external canopy. For uPVC, aluminium, and timber windows, this works without weakening the structure, provided you check reinforcement positions first.
The second method uses glazed-in trickle vents. When there's genuinely no room in the frame due to reinforcement, sightlines, or decorative constraints, this approach avoids cutting the frame altogether. The existing sealed unit is removed, a new unit manufactured around 45 mm shorter is installed, and a glazed-in vent clips into the opening above it. This method often surprises homeowners who were told retrofitting was impossible.
What about tools and skills? A window vent insert installation typically requires:
For straightforward slimline installations on uPVC frames, DIY installation is achievable in under an hour with basic tools. However, glazed-in vents or installations on aluminium and timber frames often benefit from professional assessment. If you're unsure about reinforcement positions or worried about voiding warranties, calling in a specialist makes sense.
For bathrooms and basements, a window exhaust fan for bathroom small window applications or a basement exhaust fan window setup provides more aggressive moisture removal than passive vents alone. These window ventilation exhaust fan units mount directly in the window opening and actively pull humid air outside. They're particularly useful where passive venting can't keep pace with heavy moisture loads.
Basement window vents deserve special attention. Below-grade spaces often have limited window options and persistent humidity issues. A basement window vent kit typically includes everything needed to add ventilation to an existing hopper or slider window. For a basement window with vent already installed, ensure it's functioning properly and not blocked by debris or landscaping outside.
Building new or doing a major renovation? You're in a much simpler position. Integrating trickle vents and ventilation windows from the design stage is straightforward and cost-effective compared to retrofitting later.
New builds can specify windows with factory-installed trickle vents, ensuring proper sizing and placement from day one. This eliminates the guesswork around frame reinforcement and compatibility. It also means ventilation requirements can be calculated room by room, with vent capacity matched to each space's needs.
From a cost perspective, adding vents during initial window installation is significantly cheaper than retrofitting afterward. There's no need for return visits, additional cutting, or potential warranty complications. If you're working with an architect or builder, make sure ventilation is part of the specification conversation early.
Your ownership status shapes what's possible. Homeowners have the full range of retrofit and permanent solutions available. You can cut into frames, install glazed-in vents, or even replace entire window units if needed.
Renters face more constraints. Altering a rental property is typically prohibited, and permanent modifications could cost you your security deposit or violate your lease. But that doesn't mean you're stuck with poor ventilation.
Renter-friendly ventilation options include:
These non-invasive solutions can be installed in moments and removed without a trace when moving day arrives. They won't match the performance of permanent trickle vents, but they provide meaningful improvement over no ventilation at all.
Whether you're retrofitting existing windows, planning new construction, or working within rental constraints, there's a ventilation solution that fits your situation. The key is matching the approach to your ownership status, budget, and the specific windows you're working with.
Before committing to any installation, though, it's worth understanding what building codes actually require. Some jurisdictions mandate minimum ventilation rates, and knowing the rules upfront can save headaches later.

Planning to install ventilation windows or replace existing ones? Before you pick a product or hire a contractor, there's a question worth asking: does your local building code require window vents in the first place? The answer varies more than you might expect.
Many jurisdictions mandate minimum ventilation rates for habitable rooms, bathrooms, and basements. These requirements exist because modern construction creates airtight buildings that trap moisture, CO2, and pollutants without some form of continuous air exchange.
The UK Building Regulations Part F serves as a well-known international benchmark. Under these rules, most replacement windows now require trickle vents, even if the original windows didn't have them. The logic is straightforward: you cannot reduce the background ventilation of a property during a window upgrade. Since modern windows are significantly more airtight than older models, adding trickle vents is typically the simplest way to maintain compliant airflow.
In the United States, the International Building Code and ASHRAE standards set baseline requirements. For natural ventilation, the IBC requires openable area to the outdoors of at least 4% of the floor area for habitable spaces. Ventilation rate guidelines generally call for 5-10 cubic feet per minute per person, though specific requirements depend on room type and occupancy.
What does this mean in practice? If you're installing new windows or replacing existing ones in a regulated project, your air ventilation window choices may be constrained by code. A venting window that meets aesthetic preferences but falls short on airflow capacity could fail inspection. Similarly, window ducting for mechanical systems must meet placement and sizing requirements to pass muster.
Exceptions do exist. Homes with mechanical ventilation systems like MVHR or continuous mechanical extract may not require trickle vents. Listed buildings where vents would harm historic character sometimes qualify for exemptions. Properties with existing alternative background ventilation, such as permanently open wall vents or air bricks, may also be exempt. However, these exceptions require justification and approval through building control or certification schemes.
Not every project falls under strict code requirements. Older homes undergoing minor renovations, properties in jurisdictions with less stringent rules, or DIY projects that don't trigger permit requirements may not legally require window vents.
That doesn't mean skipping them is wise. Even when not mandated, a ventilation kit for your windows is strongly recommended for moisture control and air quality. The problems that building codes aim to prevent, condensation, mold, stale air, and structural damage, don't care whether your project required a permit.
Consider this scenario: you're replacing a single window in an older home. No permit required, no inspection scheduled. You could install a standard sealed unit and call it done. But if that room already struggles with condensation or stuffiness, you've missed an opportunity. Adding a trickle vent during installation costs little extra and provides ongoing benefits.
For projects involving a duct window kit or more complex window ducting setups, professional guidance becomes more valuable. These installations often interact with HVAC systems and may have implications for overall building ventilation strategy, even if the specific window work doesn't trigger code requirements.
Always verify local ventilation requirements before specifying window vents — compliance requirements vary significantly by region and building type.
The practical takeaway? Check with your local building authority before specifying or installing vents, especially for new construction or full window replacement projects. Requirements differ not just between countries but between municipalities. What's mandatory in one jurisdiction may be optional in another. Getting clarity upfront prevents costly rework and ensures your ventilation windows actually meet the standards that apply to your specific situation.
Understanding code requirements is one piece of the puzzle. The next step is knowing what separates a quality trickle vent from a mediocre one, and how to choose components that will perform reliably for years.
You've navigated building codes and understand what's required. Now comes the practical question: how do you tell a quality trickle vent from one that will fail within a few years? Not all vents are created equal, and the difference between a well-engineered product and a budget option often shows up long after installation.
When shopping for trickle vents, five factors separate reliable products from those that cause headaches down the road.
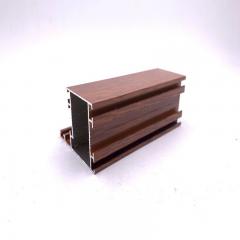
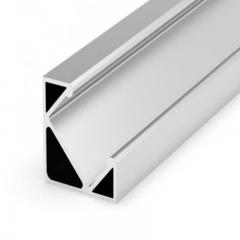
Material durability tops the list. You'll find trickle vents in two main materials: aluminium and plastic. Each has its place, but the quality within each category varies dramatically.
Aluminium vents offer superior longevity, especially in demanding environments. They resist warping under temperature extremes, won't become brittle over time, and provide a premium architectural finish that matches aluminium or composite window systems. For coastal locations, high-rise buildings, or projects prioritizing lifecycle performance, aluminium is the stronger choice. The material is also fully recyclable, making it attractive for sustainability-focused projects.
Plastic vents remain a practical option when specified carefully. Modern UV-stabilised polymers can withstand extreme temperature cycles, offer quiet operation, and last 20+ years if properly engineered. The key is avoiding the cheapest options. Low-quality plastic vents often develop problems post-installation: sliders snap or jam, canopies become brittle and weather-stained, and poor sealing compromises both airflow and acoustic isolation.
Beyond material, here's what else matters:
Installation ease matters too. A window venting kit that requires specialized tools or professional installation adds cost and complexity. The best products include clear instructions, all necessary hardware, and fit standard frame dimensions without custom cutting.
Theory is helpful, but seeing how these criteria apply to an actual product makes the selection process concrete. Shengxin Aluminium's durable window trickle vents check the boxes discussed above.
These vents are available in both premium aluminium and plastic finishes, giving you flexibility based on project requirements and budget. The aluminium option suits high-end developments, coastal properties, or anywhere long-term durability is the priority. The plastic variant works well for standard residential applications where cost efficiency matters.
Compatibility is broad. The vents fit uPVC and timber window systems, covering the two most common frame materials in residential construction. This versatility simplifies specification for contractors working across different project types and eliminates the need to source separate products for different frame materials.
From a compliance standpoint, these vents meet international standards including UK Part F requirements for background ventilation. For construction professionals navigating regulatory requirements, this means one less variable to worry about during inspections.
The design focuses on continuous passive airflow without compromising insulation. You get the ventilation benefits, moisture control, air quality improvement, condensation prevention, without creating thermal bridges that undermine your window's energy performance.
For homeowners tackling a DIY retrofit or contractors sourcing components for a larger project, the product page provides specifications and ordering information. It's a straightforward resource for anyone moving from research to actual installation.
Whether you're specifying replacement vent windows for a renovation, adding ventilation to existing frames, or planning a new build, the selection criteria remain the same. Material quality, verified performance, frame compatibility, and installation practicality determine whether your trickle vents will perform reliably for years or become a maintenance headache.
Once you've installed quality vents, the next question is keeping them working properly. Even the best products need occasional attention to maintain peak performance.
Installed your vents and moved on? That's understandable. These small components blend into window frames and quietly do their job without demanding attention. But here's the thing: even the best-engineered window air vents need occasional care to keep performing at their best.
The good news? Maintenance is minimal. A few minutes twice a year keeps airflow consistent and prevents the kind of buildup that turns a functioning vent into a blocked one.
Think about what passes through your windows vents every day. Air carries dust, pollen, and fine particles that gradually accumulate inside the narrow openings. In urban areas or near busy roads, this buildup happens faster. Add moisture from humid indoor air, and you've got conditions where mold can take hold.
When debris clogs a small vent, airflow drops significantly. The gaps in trickle vents and passive inserts are narrow by design, so it doesn't take much to obstruct them. A vent that's 50% blocked delivers 50% less ventilation, which defeats the purpose of having it installed.
Cleaning is straightforward. Most blockages come from dust, and removing it takes just a few minutes:
That's it. No special tools, no professional help needed. When you're cleaning around your windows anyway, pop the vents open and give them a quick once-over. This simple habit prevents the gradual performance decline that catches many homeowners off guard.
One thing to watch: curtains and blinds can block vents for windows without you realizing it. If you've noticed reduced airflow despite the vent being open, check whether window treatments are covering the opening. Repositioning fabric or choosing shorter curtains often solves the problem.
Cleaning handles most issues, but vents don't last forever. Materials degrade, mechanisms wear out, and eventually replacement becomes the smarter choice. How do you know when that point arrives?
Watch for these indicators that a window air vent has reached end of life:
Material choice affects longevity significantly. Aluminium resists corrosion, rust, and warping, making it the more durable option in high-humidity environments like bathrooms and kitchens. Quality aluminium vents can last 40-50 years with minimal degradation. Plastic vents, while cost-effective, may show signs of brittleness or discoloration after prolonged UV exposure, particularly in south-facing windows.
If you're seeing multiple warning signs on a plastic vent, consider upgrading to aluminium during replacement. The higher upfront cost pays off through extended service life and better performance in demanding conditions.
Twice a year works well for most homes. Schedule inspections before winter and after summer, when seasonal changes put different demands on your ventilation system.
Before winter, you want vents clear and functional to handle the increased moisture load from heating, cooking, and reduced natural ventilation. After summer, you're checking for dust accumulation from open-window season and any UV damage to plastic components.
High-humidity spaces like bathrooms and basements benefit from more frequent checks. If you notice condensation returning or musty odors developing, inspect vents immediately rather than waiting for the next scheduled maintenance.
The effort is minimal, but the payoff is real. Vents for windows that receive regular attention maintain consistent airflow, prevent moisture problems, and last significantly longer than neglected ones. A few minutes of maintenance protects the investment you made in better indoor air quality.
Of course, even well-maintained vents have limits. Some ventilation challenges require more than passive airflow can deliver. Knowing when window vents aren't the right solution saves you from expecting too much from these simple but effective components.
Trickle vents and passive inserts are excellent tools for background ventilation. But they're not magic. There are situations where these simple, passive solutions simply can't keep up with the demands of a space. Recognizing those limits upfront saves you from frustration, wasted money, and ventilation problems that persist despite your best efforts.
Let's be direct about what window ventilators can and can't do.
A typical trickle vent allows 20-50 m³/h of airflow at standard pressure. That's enough for a bedroom or living room under normal conditions. But some spaces generate moisture and pollutants far beyond what passive venting can handle.
Commercial kitchens illustrate the problem clearly. A gas hob alone requires 70 m³/h of extraction. Add steam from dishwashers, boiling pots, and multiple cooking stations, and you're looking at moisture loads that would overwhelm a dozen trickle vents. Indoor pools face similar challenges. The constant evaporation from a heated pool surface creates humidity levels that passive vents can't begin to address.
Even in residential settings, certain conditions push beyond what window vents can manage:
There's another scenario worth mentioning: when trickle vents are installed but condensation persists. Trickle vents alone may not provide sufficient ventilation to manage high humidity levels, especially in poorly insulated or highly airtight homes. If you've had vents installed and still wake up to foggy windows, the problem likely requires a more aggressive solution.
The fundamental limitation? Window ventilators provide low-level background airflow. They're designed for continuous, gentle air exchange, not high-volume extraction. When your ventilation needs exceed that capacity, it's time to consider mechanical alternatives.
When passive vents fall short, mechanical systems step in. These powered solutions offer controlled, consistent airflow regardless of weather conditions or building tightness.
Mechanical Extract Ventilation (MEV) uses fans to actively pull stale air from wet rooms like bathrooms and kitchens. A dedicated exhaust window setup or wall-mounted extractor removes humid air at the source before it spreads through your home. For a bathroom ventilation window that can't keep pace with shower steam, adding an exhaust fan for basement window or bathroom applications provides the extraction power passive vents lack.
Mechanical Ventilation with Heat Recovery (MVHR) represents the most comprehensive solution. These whole-house systems extract stale air while simultaneously supplying fresh, filtered air. The key advantage? Heat exchangers recover 50-90% of warmth from outgoing air, dramatically reducing the energy penalty of ventilation. For new construction or major renovations, MVHR often makes more sense than relying on window vents alone.
Here's when to consider alternatives over window vents:
One important consideration: MVHR and trickle vents don't mix well. Heat recovery systems are closed loops. Adding window vents introduces uncontrolled cold air that bypasses the heat exchanger, reducing efficiency and disrupting airflow balance. If you're installing MVHR, you'll typically want airtight windows without trickle vents.
For basements specifically, an exhaust fan for basement window applications or a dedicated basement vent window with mechanical assist often provides the best results. Passive vents struggle in below-grade spaces where natural stack effect is minimal and humidity sources are persistent. Combining a hopper window with a small extraction fan addresses both air exchange and moisture removal.
What about ac window exhaust setups? These portable units that vent through windows work for temporary cooling but aren't a ventilation solution. They recirculate indoor air rather than exchanging it with fresh outdoor air. For actual ventilation needs, purpose-built systems outperform improvised arrangements.
The honest takeaway? Window vents are excellent for their intended purpose: continuous, low-level background ventilation in typical residential spaces. They're affordable, passive, and effective when properly matched to the room's needs. But they're one tool in a broader ventilation toolkit. Knowing their limits helps you choose the right solution from the start, whether that's a simple trickle vent, a bathroom exhaust fan, or a whole-house MVHR system.
Window vents provide continuous, controlled airflow without fully opening your window. They help dilute indoor pollutants like CO2 and VOCs, control humidity levels, and prevent condensation buildup on glass surfaces. Trickle vents work passively around the clock without electricity, making them ideal for maintaining healthy indoor air quality while keeping windows secure and reducing noise intrusion from outside.
Trickle vents significantly reduce condensation by maintaining steady air exchange that prevents moisture from settling on cold glass surfaces. They work by equalizing indoor and outdoor humidity levels through continuous low-level airflow. However, in homes with very high humidity loads or poor insulation, trickle vents alone may not fully eliminate condensation, and additional measures like dehumidifiers or mechanical ventilation might be needed.
Yes, retrofitting vents to existing windows is possible through two main methods. Slimline frame-fitted vents require cutting a narrow slot into the window frame head, suitable for uPVC, aluminium, and timber frames. Glazed-in trickle vents avoid frame cutting entirely by replacing the sealed unit with a shorter one and fitting a vent above it. Most DIY installations on uPVC frames take under an hour with basic tools.
Requirements vary by jurisdiction. UK Building Regulations Part F mandate trickle vents in most replacement windows to maintain background ventilation. In the US, the International Building Code requires openable area of at least 4% of floor area for natural ventilation in habitable spaces. Always check local building authority requirements before installation, as compliance rules differ significantly between regions and building types.
Trickle vents are small slots in window frames providing continuous low-level background airflow while windows remain closed and locked. Hopper windows are full window units hinged at the bottom that open inward from the top, offering medium ventilation rates when opened. Trickle vents are budget-friendly and DIY-installable, while hopper windows require professional installation but deliver higher airflow, making them better suited for basements and bathrooms.


 خدمة الإنترنت
 0086 136 3563 2360
 sales@sxalu.com
 +86 136 3563 2360
 العربية
 English
 français
 Deutsch
 русский
 español
 português
 ไทย
ไทย Việt
Việt Українська